Tier Configuration
Set tier names, commission rates, feature access, and promotion behavior for Standard Affiliates and VIP Partners.
Before you start
- Decide what separates a Standard Affiliate from a VIP Partner in your program.
Where to find it
Merchant sidebar → Settings → Tier Configuration
Steps
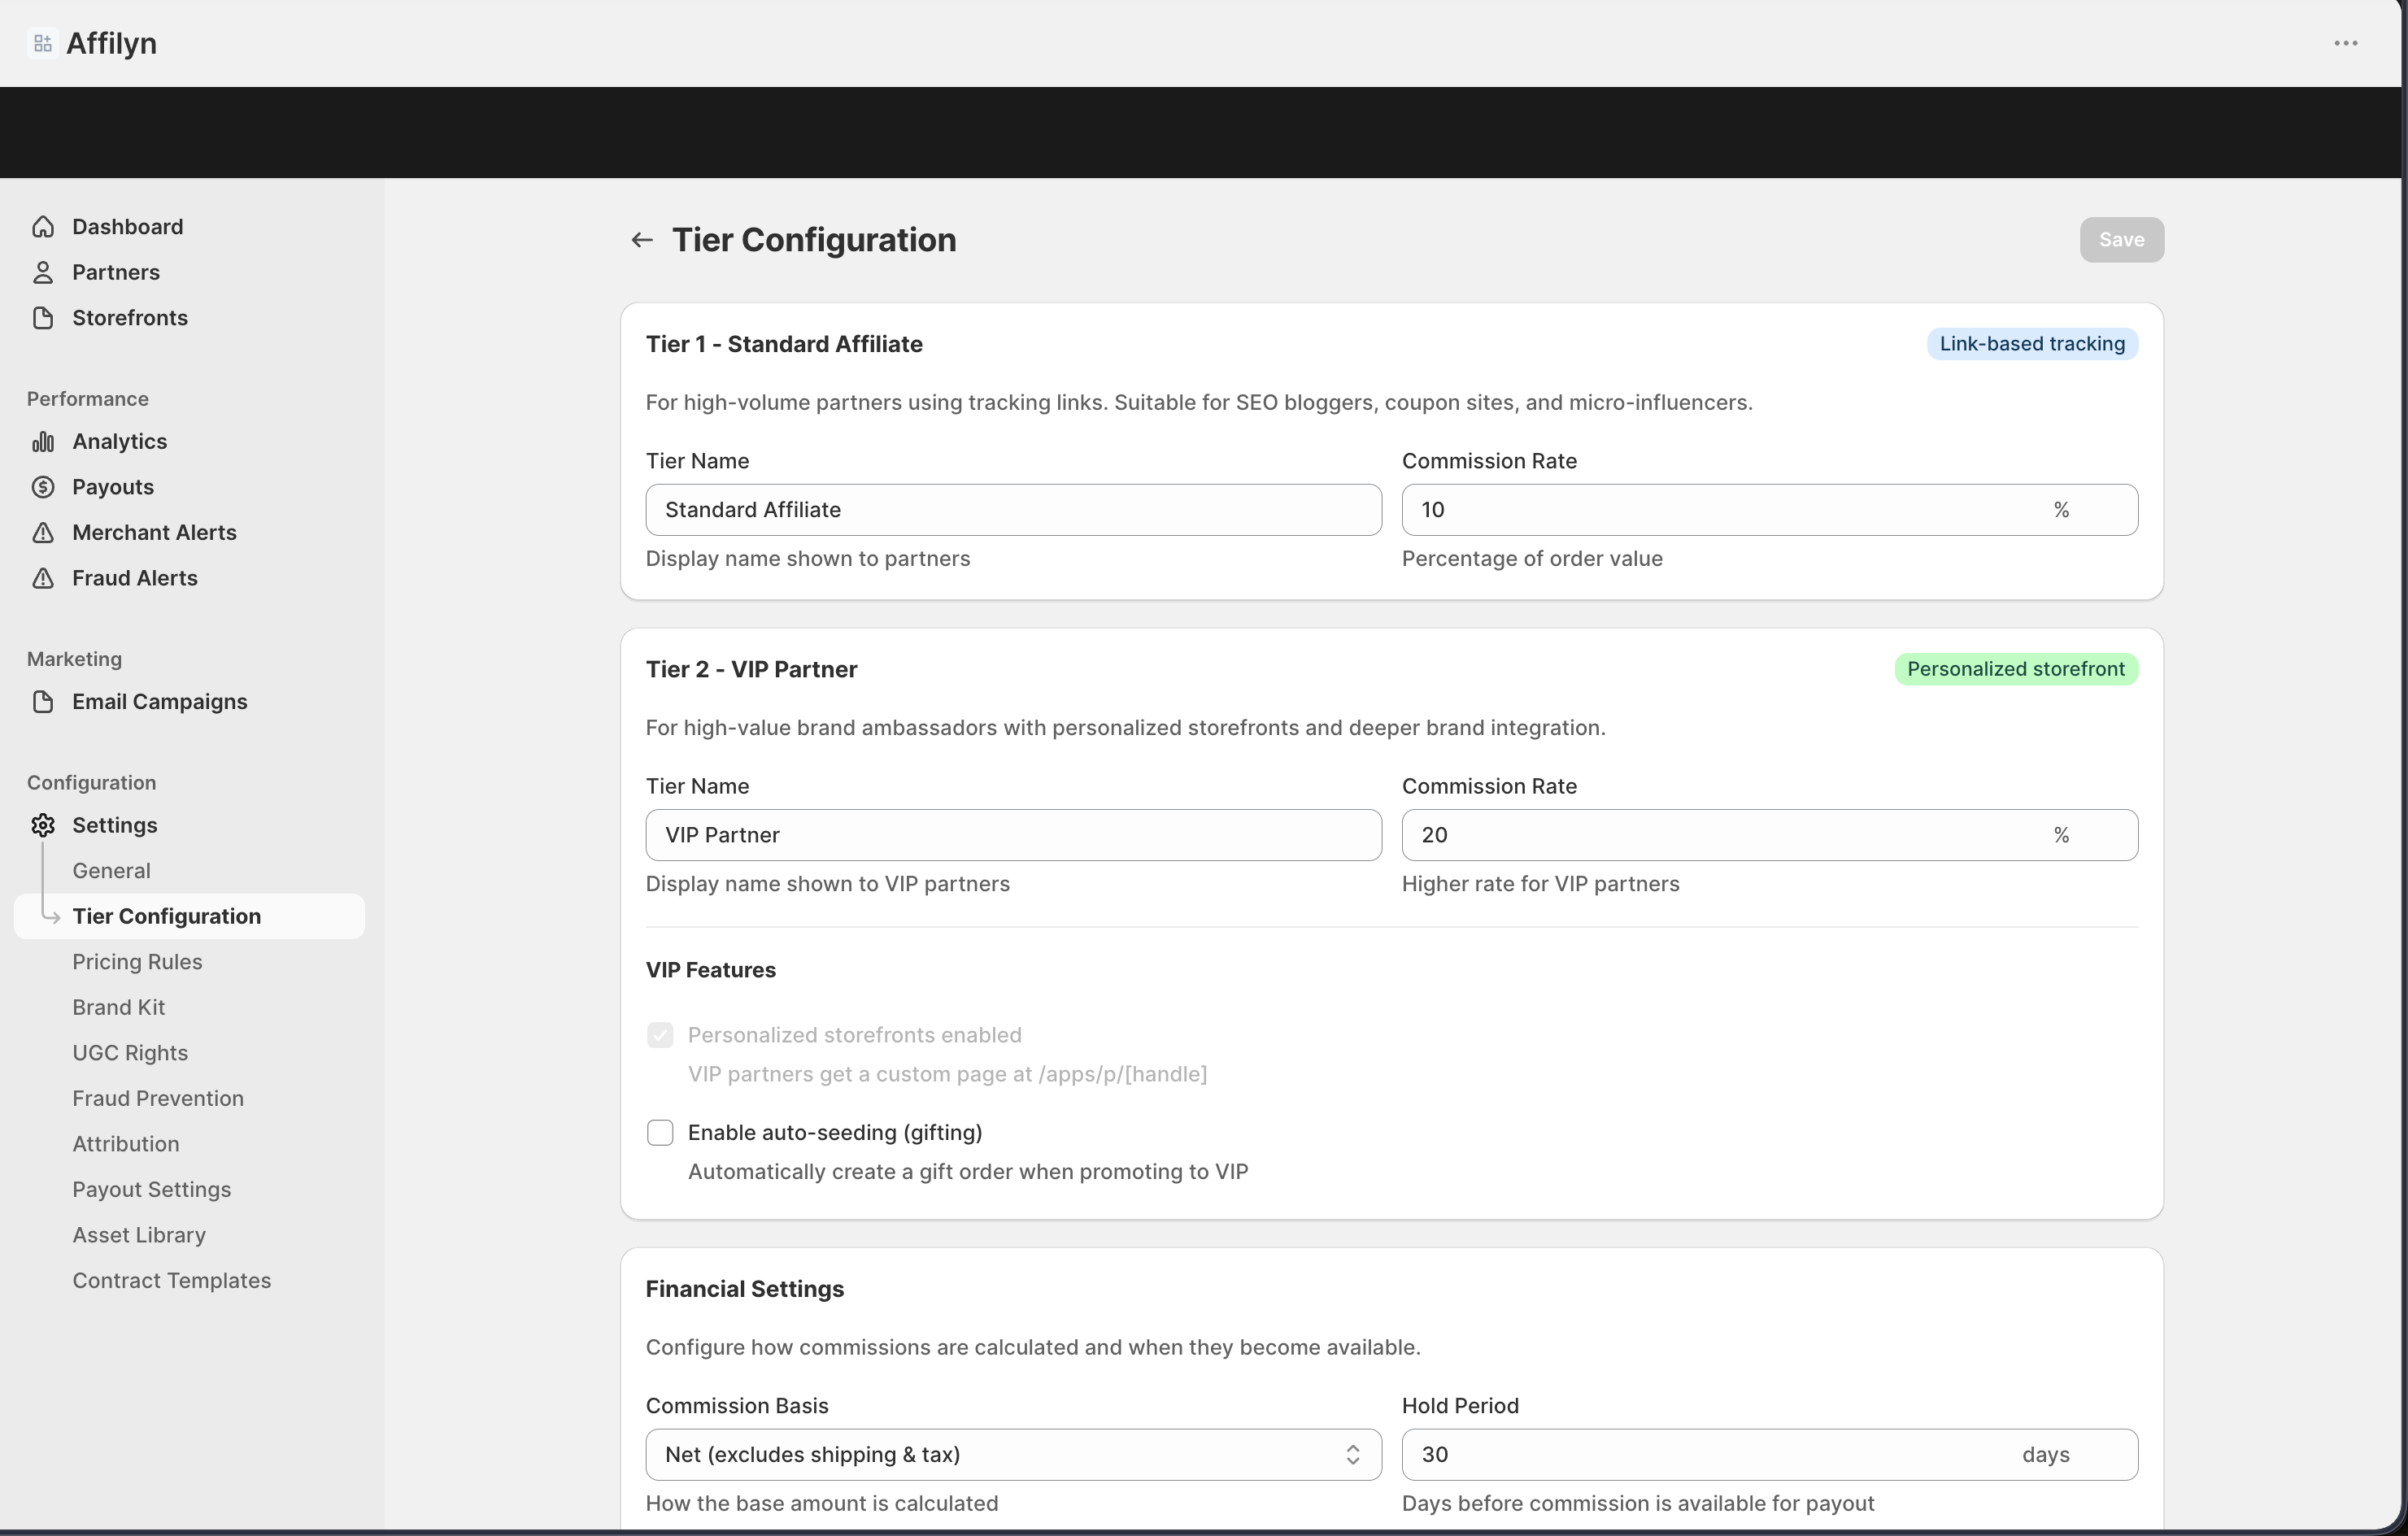
Step 1.
Open Settings → Tier Configuration.
Step 2.
Review the tier names so they match the language you want partners to see.
Step 3.
Set the commission rate for each tier.
Step 4.
Review the feature matrix to confirm which tools are available to each tier.
Step 5.
Choose the promotion behavior that matches how much automation you want.
Step 6.
Save the thresholds and intake rules that support your promotion process.
Settings explained
- Tier labels are the names merchants and partners see in the app.
- Commission rates define the default payout rate for each tier.
- Feature matrix controls which premium tools belong to VIP access.
- Promotion mode decides whether movement between tiers is automatic, recommended for review, or manual only.
- Thresholds and intake weights support the rules used for tier decisions.
Example
A merchant keeps Tier 1 as Standard Affiliate, renames Tier 2 to VIP Partner, gives VIP a higher commission rate, enables premium storefront tools only for VIP, and uses review-based promotion instead of full automation.
Tips and limits
- Rename tiers carefully so partners always understand what their current access means.
- Check feature access before promoting or locking a partner into a tier.
- Review thresholds after major campaign periods because partner performance can change quickly.