Manage partners
Invite, add, organize, and update partner profiles from the merchant side.
Before you start
- Finish the setup wizard.
- Decide whether you want to invite verified partners, accept applications, or add partners manually.
Where to find it
Merchant sidebar → Partners
Steps
Step 1.
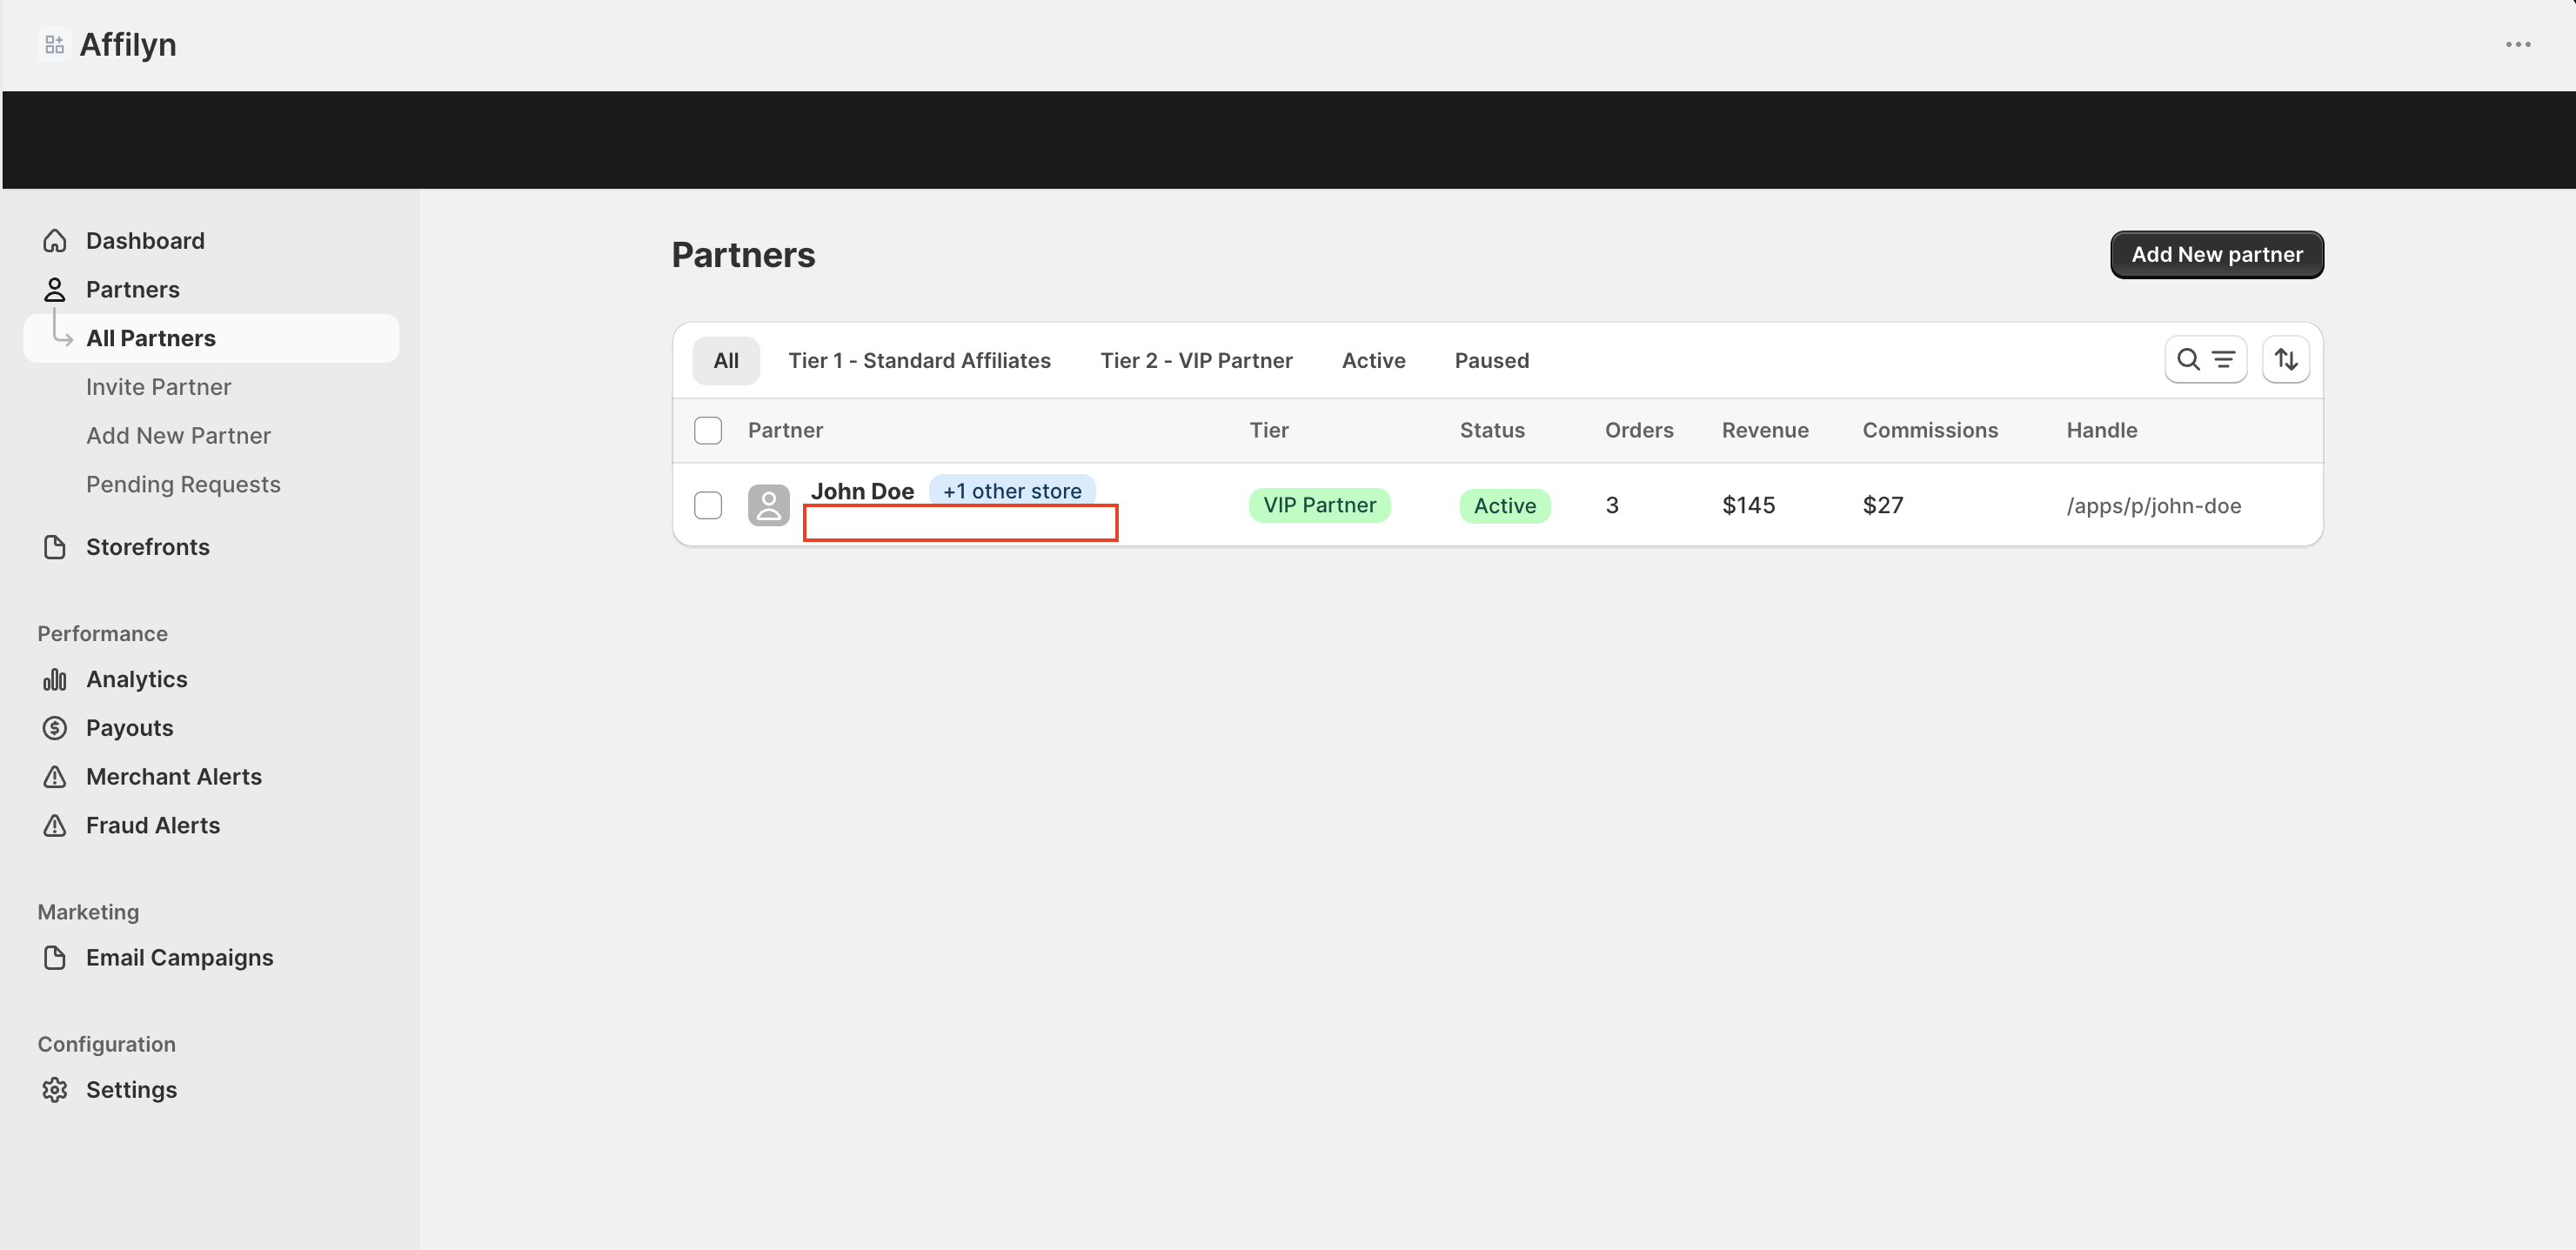
Open Partners → All Partners to review your current partner list.
Step 2.
Use search, tabs, and sorting to find the right partner quickly.
Step 3.
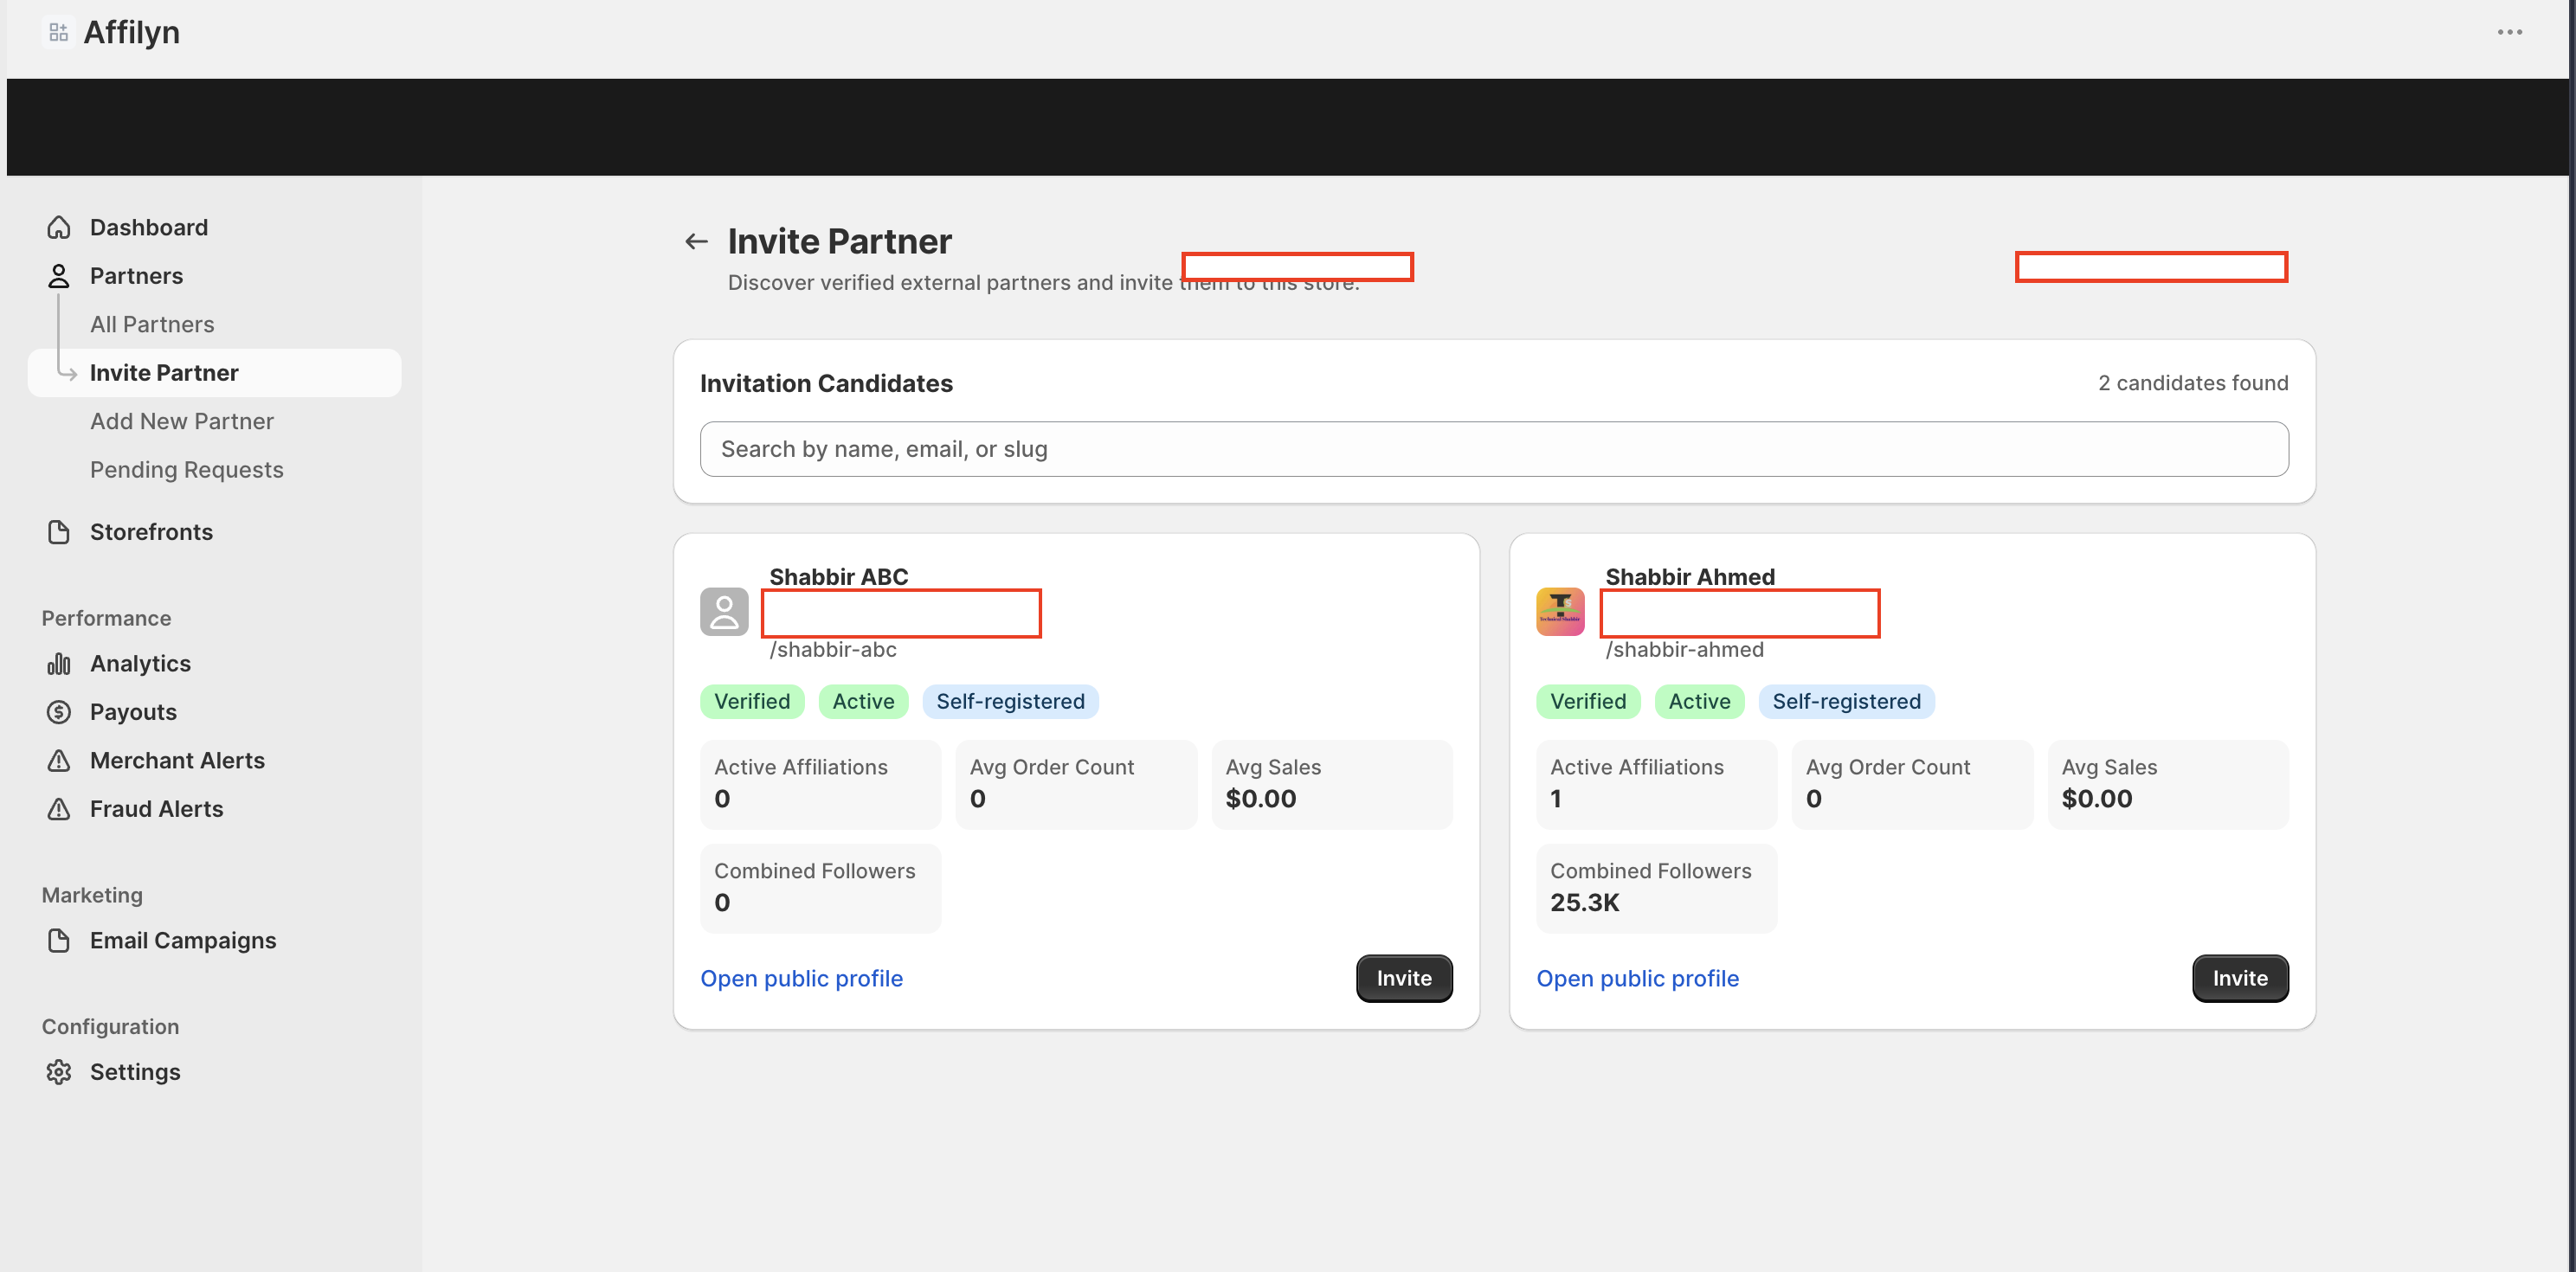
Open Invite Partner to discover verified candidates and send invitations.
Step 4.
Open Add New Partner if you want to create a partner profile directly.
Step 5.
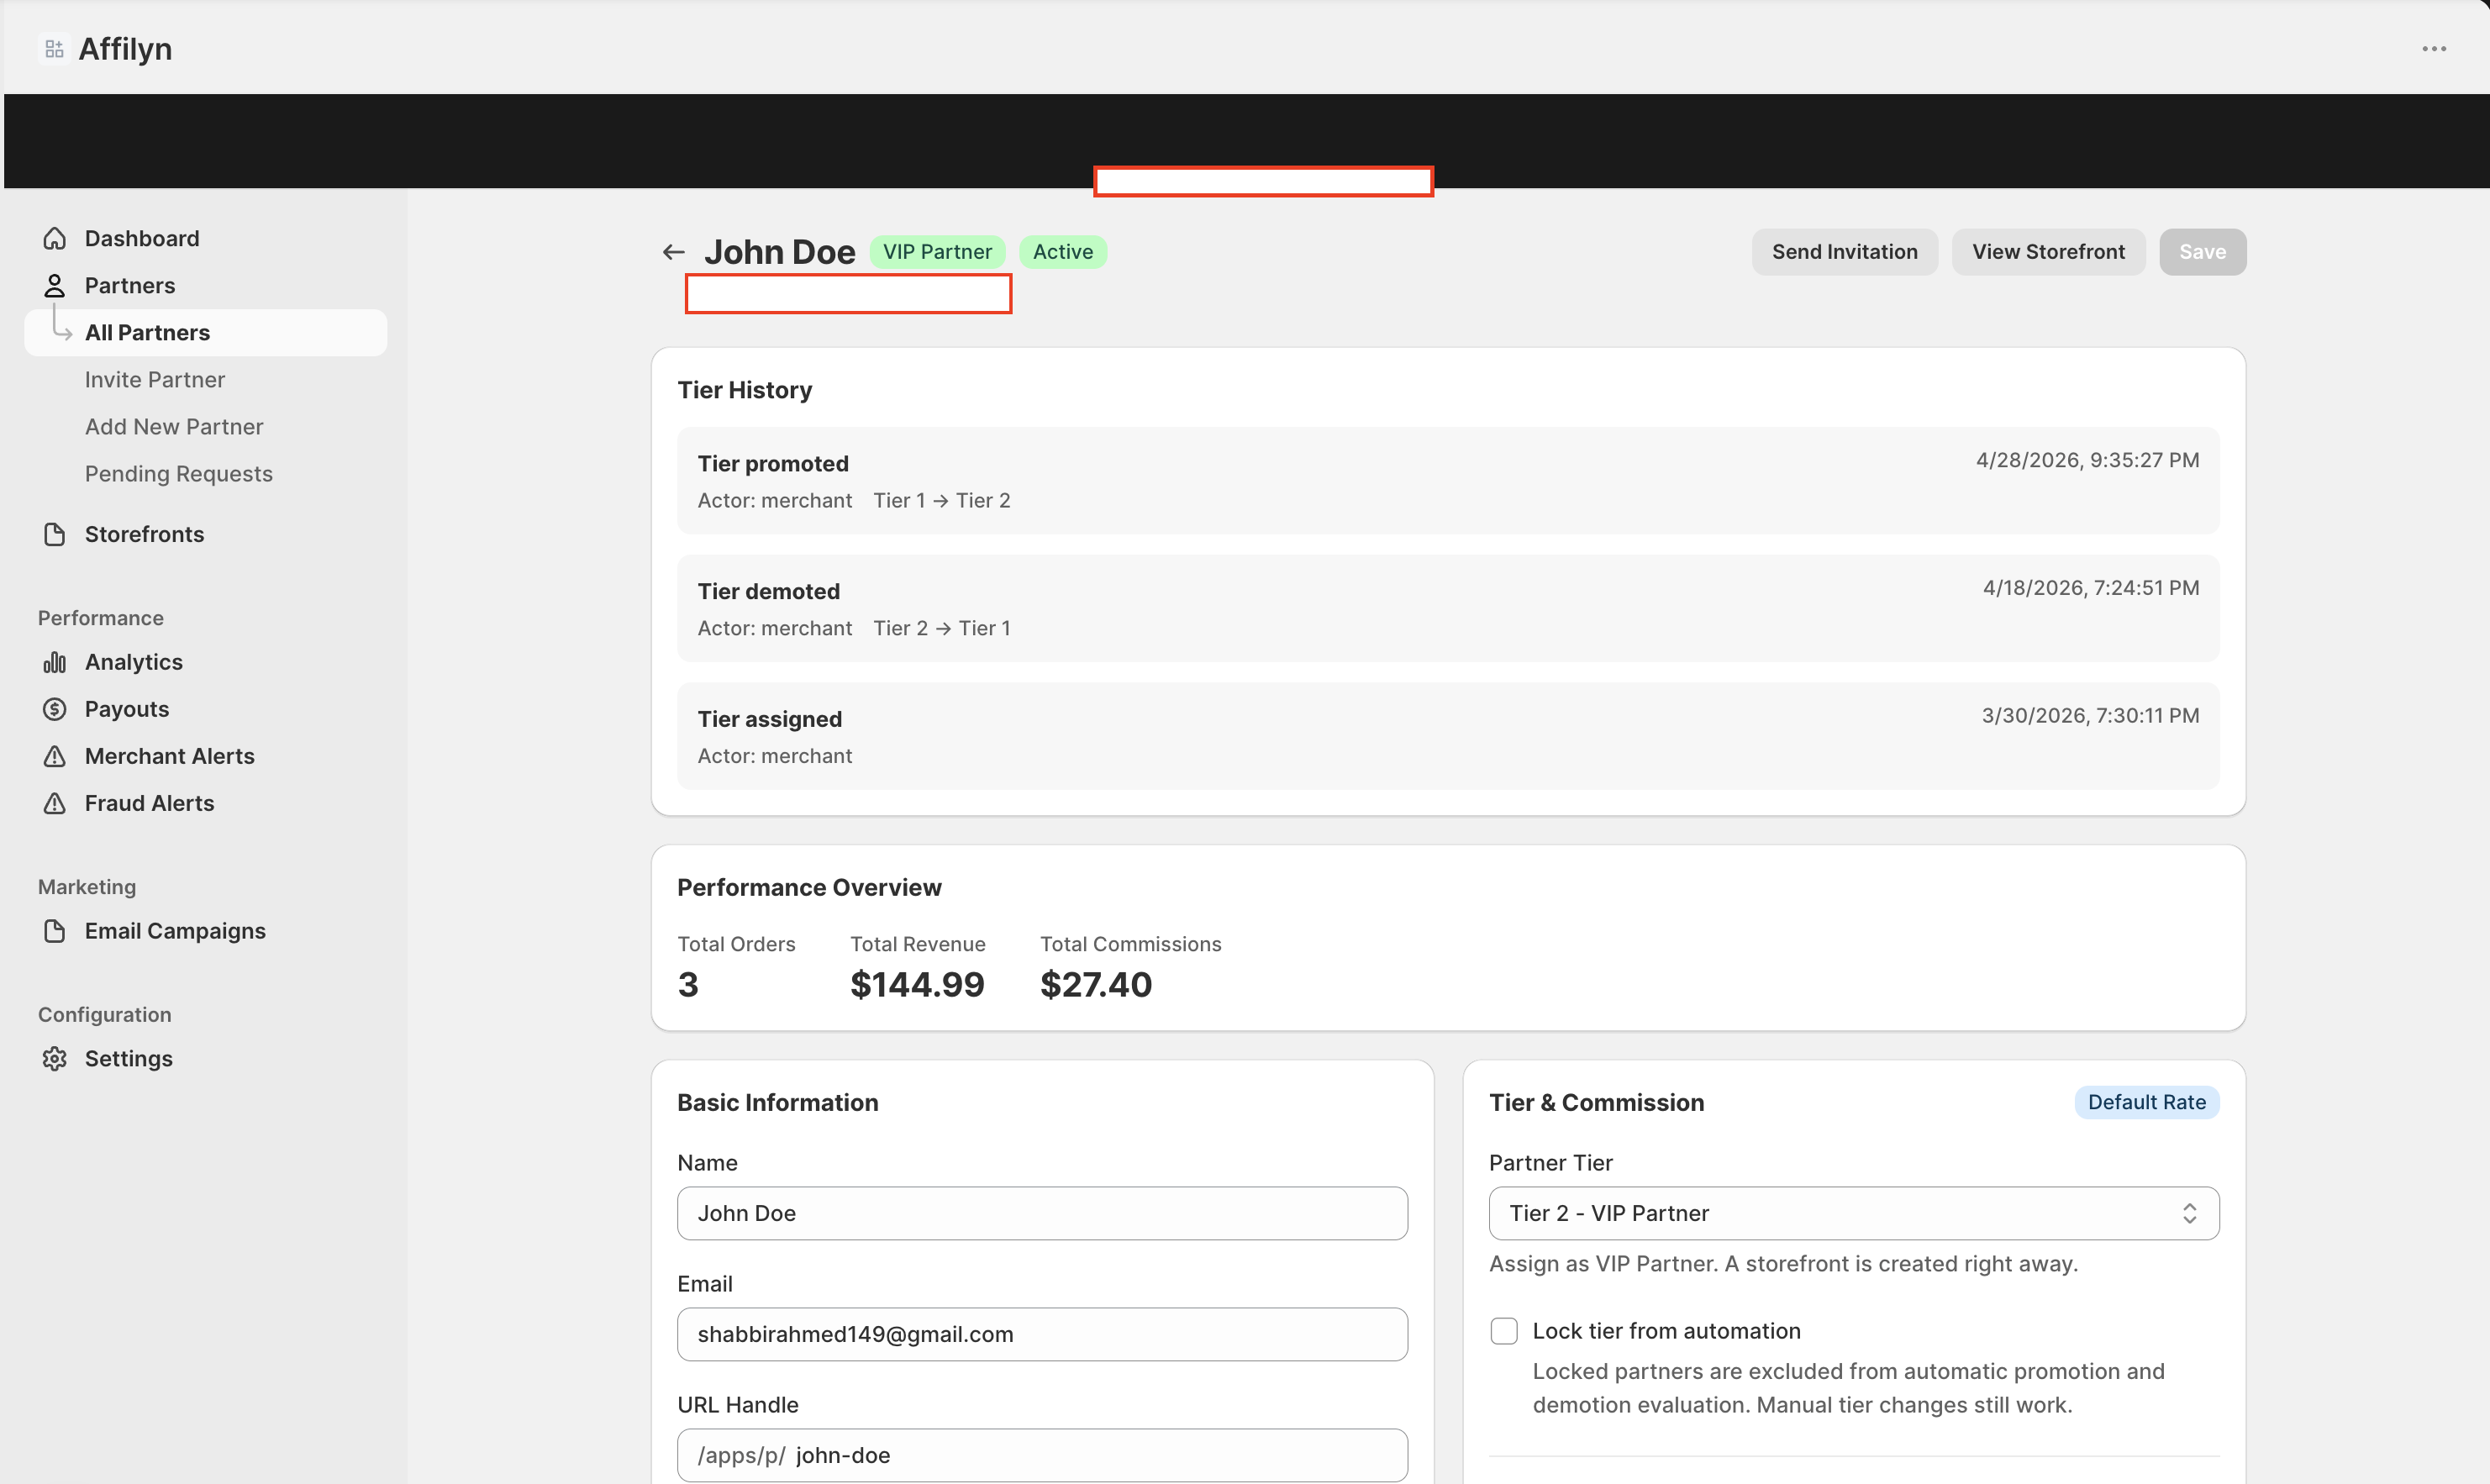
Open any partner record to update tier, status, socials, commission, contracts, or storefront access.
Step 6.
Use the detailed partner page when you need tier history, contract actions, social identifiers, or demotion review.
Settings explained
- Tier can be automatic, Standard Affiliate, or VIP Partner depending on the workflow.
- Tier lock keeps the tier from changing automatically.
- Custom commission overrides the default program rate for that partner.
- Tier history helps merchants understand previous promotions or changes.
- Demotion flags highlight a partner record that needs review.
- Social identifiers support deeper sync or matching workflows when available.
- Contract actions include generate, send, resend, or void when the contract workflow is active.
Example
A merchant meets a promising partner outside the app, uses Add New Partner, assigns them directly to VIP Partner, adds a custom commission, and then opens the partner profile to send an invitation and prepare storefront access.
Tips and limits
- Use verified invitations when you want to recruit from an external candidate pool.
- Use manual add when you already know the partner and want more control over the starting setup.
- Keep the partner email accurate because invitations and partner login depend on it.
- If gifting matters for VIP onboarding, capture the partner shipping address during manual setup instead of waiting until later.