
Public storefront experience
Understand the shopper-facing storefront experience, including welcome messaging, discount presentation, seasonal styling, partner application CTAs, and post-purchase messaging.
When to use this page
- You want to review the public storefront experience as a shopper, applicant, merchant, or VIP partner.
- You need to confirm what visitors see before sharing a storefront or launching a recruiting push.
Before you start
- Have an active VIP storefront or storefront preview to review.
Success looks like
- The hero, welcome state, discount presentation, application CTA, and thank-you messaging match the intended public experience.
- You can tell whether a missing storefront behavior comes from access mode, theme placement, or current campaign settings.
Where to find it
Open the live storefront or the storefront preview.
Steps
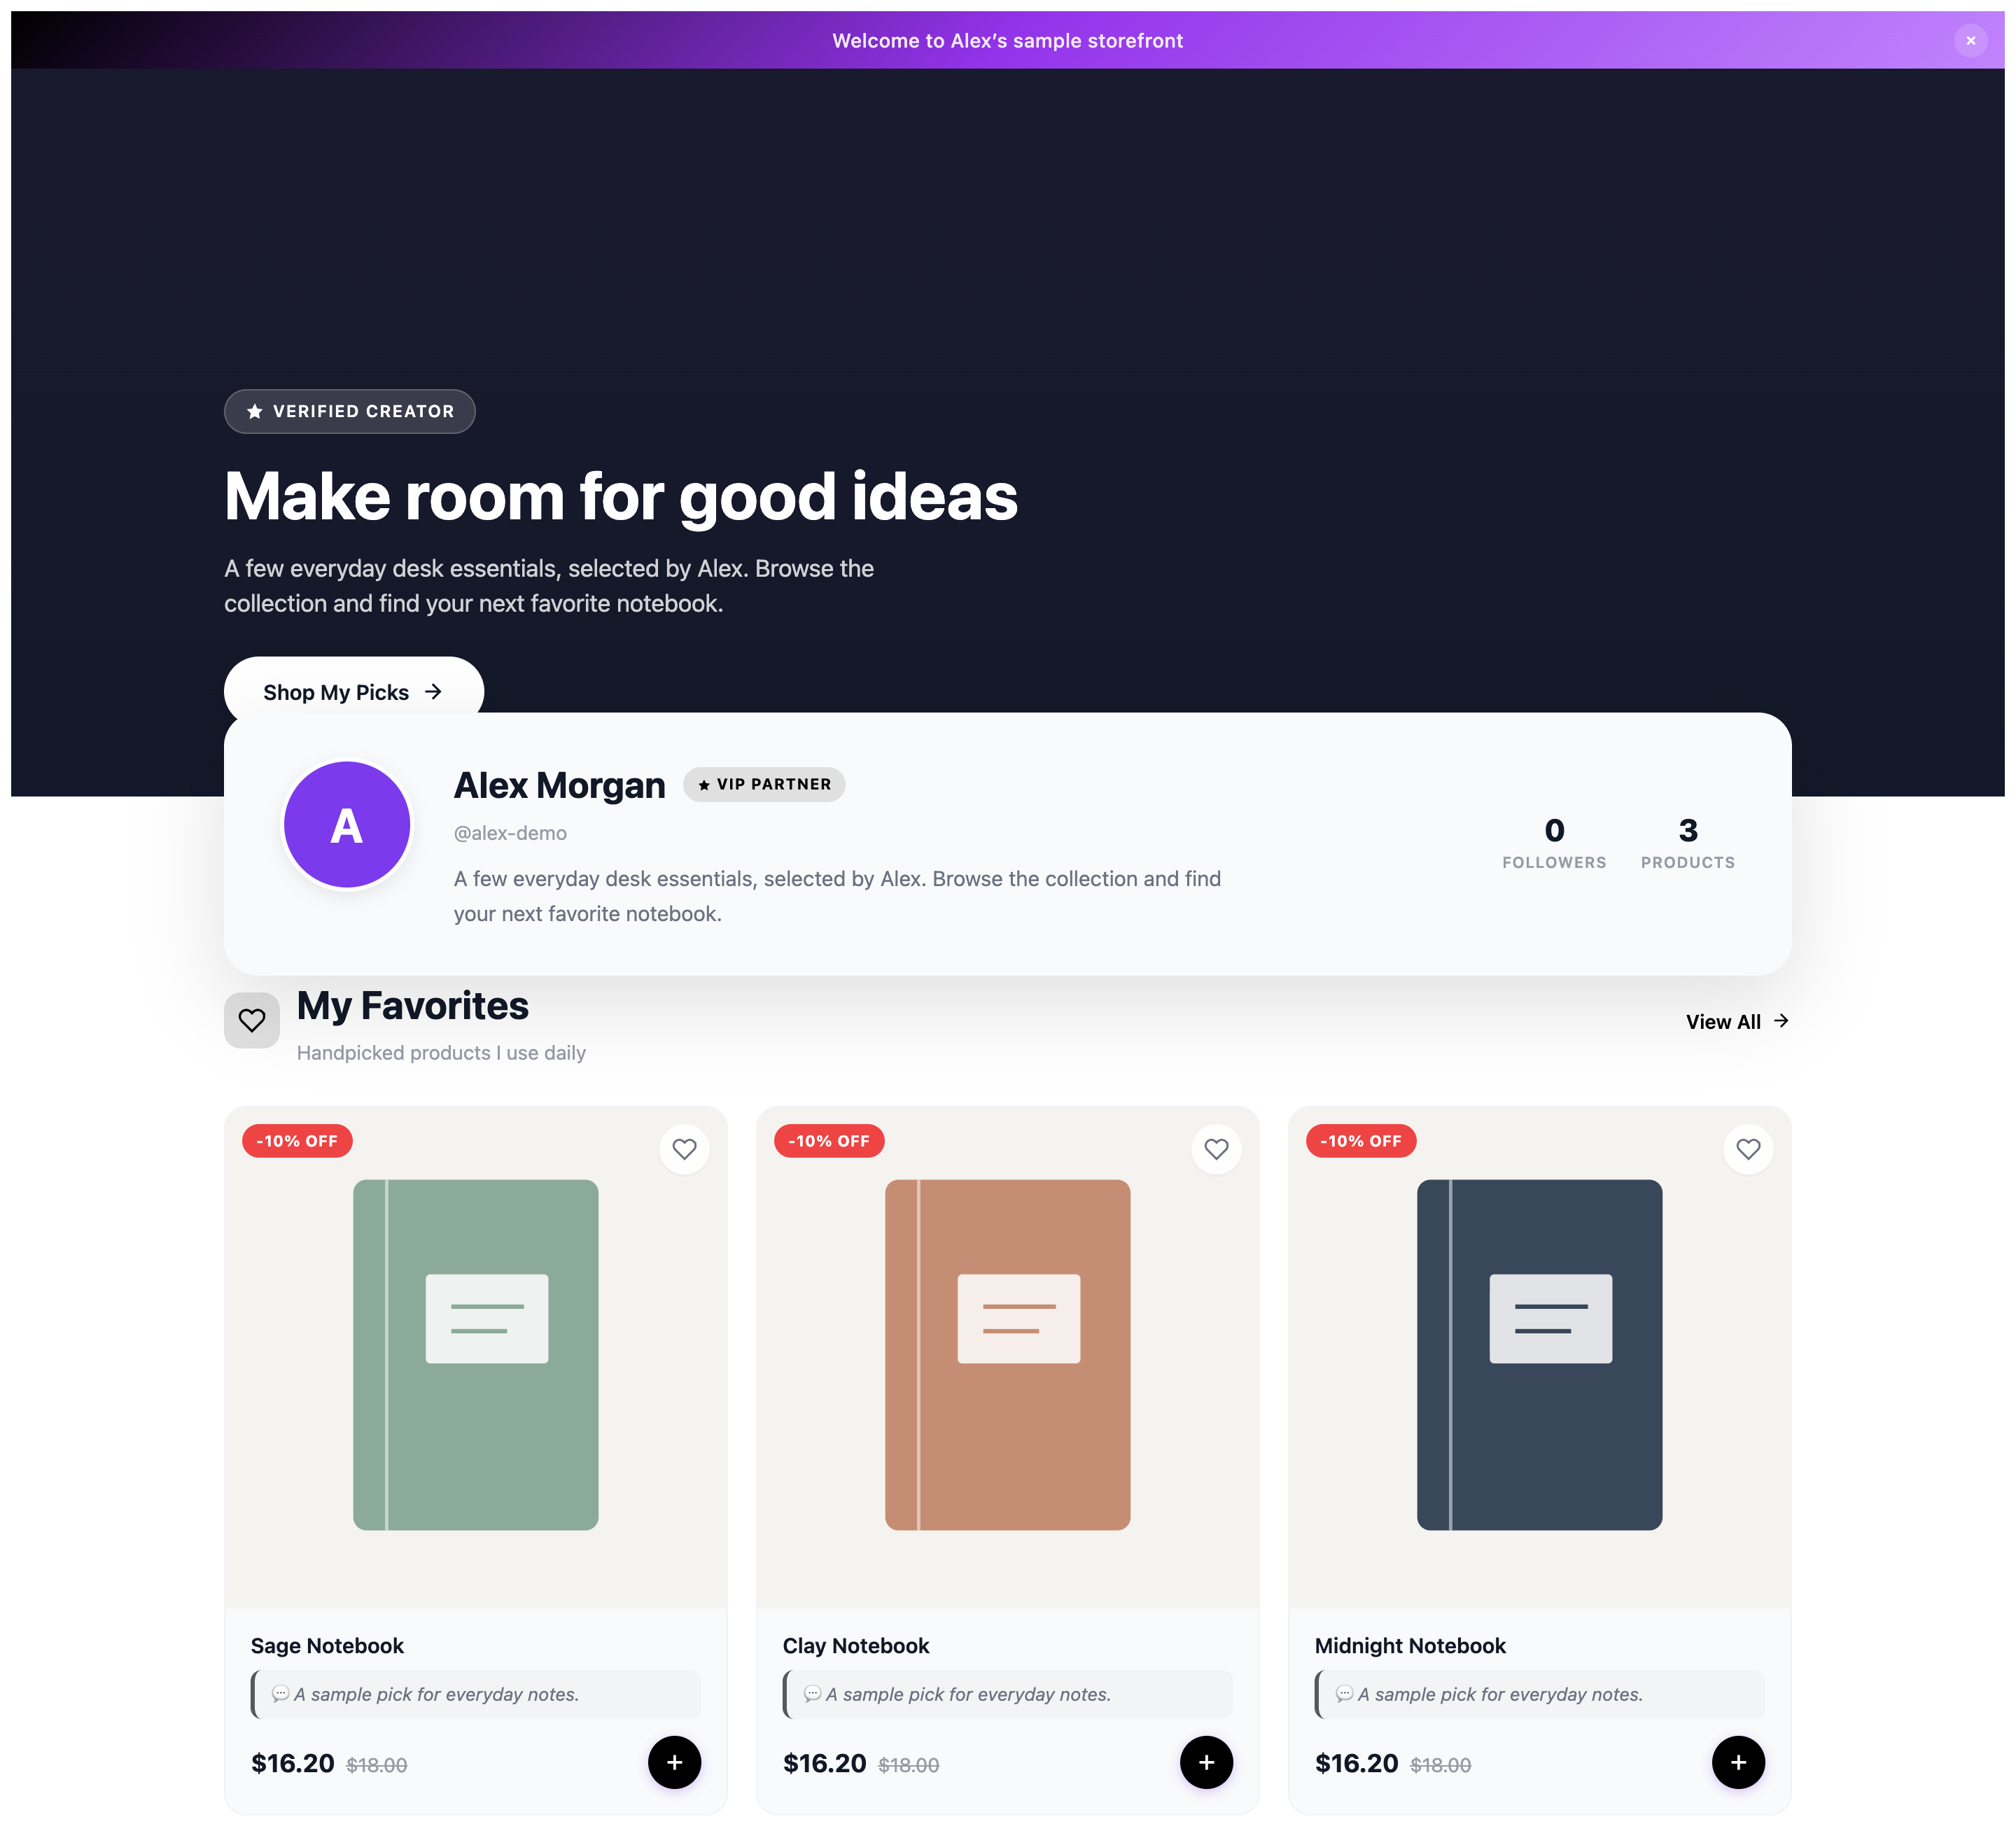
View full-size image: Shopper-facing storefront
Step 1.
Open the live storefront or preview it before sharing the link.
Step 2.
Review the headline, hero media, welcome banner, and featured products as a first-time visitor and as a returning visitor when possible.
Step 3.
If the store is recruiting publicly, click the storefront Apply as a Partner button and confirm the modal opens with the expected Modal title and Success message.
Step 4.
Check how the storefront discount appears, or confirm that it stays hidden when that mode is enabled.
Step 5.
Review seasonal styling, campaign-specific messaging, and the thank-you experience later in the journey after an attributed checkout.
Settings explained
- Welcome banner shapes the first impression when a shopper opens the storefront. Returning visitors can see a more personalized greeting when that experience is enabled.
- Partner Apply Button is the storefront CTA used for store-specific partner applications when the merchant has published it.
- Partner Application Modal powers the public application form and the visible reCAPTCHA site key setting.
- Seasonal themes change storefront styling for special launches or campaigns when the merchant has enabled them for the store.
- Discount visibility controls whether shoppers see the discount openly or receive it more quietly in the storefront journey.
- Thank-you message adds a partner-branded closing message in the checkout thank-you flow after an attributed order.
Example
A merchant previews the storefront before a recruitment push, confirms the Apply as a Partner button opens the right modal copy, checks the hero and seasonal styling, and then publishes the page once both shoppers and applicants get the intended experience.
Tips and limits
- Always review the shopper-facing preview before sharing a live storefront.
- Use a private or fresh browser session when you want to compare the first-visit experience with the returning-visitor banner.
- If the storefront application button is missing, re-check Theme Editor placement and whether the merchant enabled public applications in Partner Program.
- If the storefront looks right in the builder but not in the public view, re-check access mode, published state, and store context.
Current behavior
- Returning visitors can see a different welcome banner when that experience is enabled for the storefront.
- Seasonal styling and thank-you messaging appear only where the current store and campaign state support them.
Limitations
- Public recruiting still depends on both admin application access and published Theme Editor placement of the storefront CTA.
- Public behavior can differ from builder previews if you are reviewing the wrong store, access mode, or publication state.