
Merchant first-time setup
Complete the merchant onboarding flow and prepare the program for partner recruiting, payouts, and daily operations.
When to use this page
- You just installed Affilyn or reopened an unfinished merchant onboarding flow.
- You want the minimum merchant setup complete before inviting partners or reviewing payouts.
Before you start
- Install Affilyn in your Shopify store.
- Sign in with a merchant account that can manage the app.
Success looks like
- The setup wizard is completed or intentionally skipped with remaining settings reviewed afterward.
- Business details, commission, payout readiness, and email settings are understood before daily operations begin.
- You know whether public applications and Theme Editor placement still need to be published.
Where to find it
Shopify admin → Apps → Affilyn → Setup wizard
Steps
Step 1
Open Affilyn from your Shopify apps list.
Step 2
On the first launch, the setup wizard can open automatically.
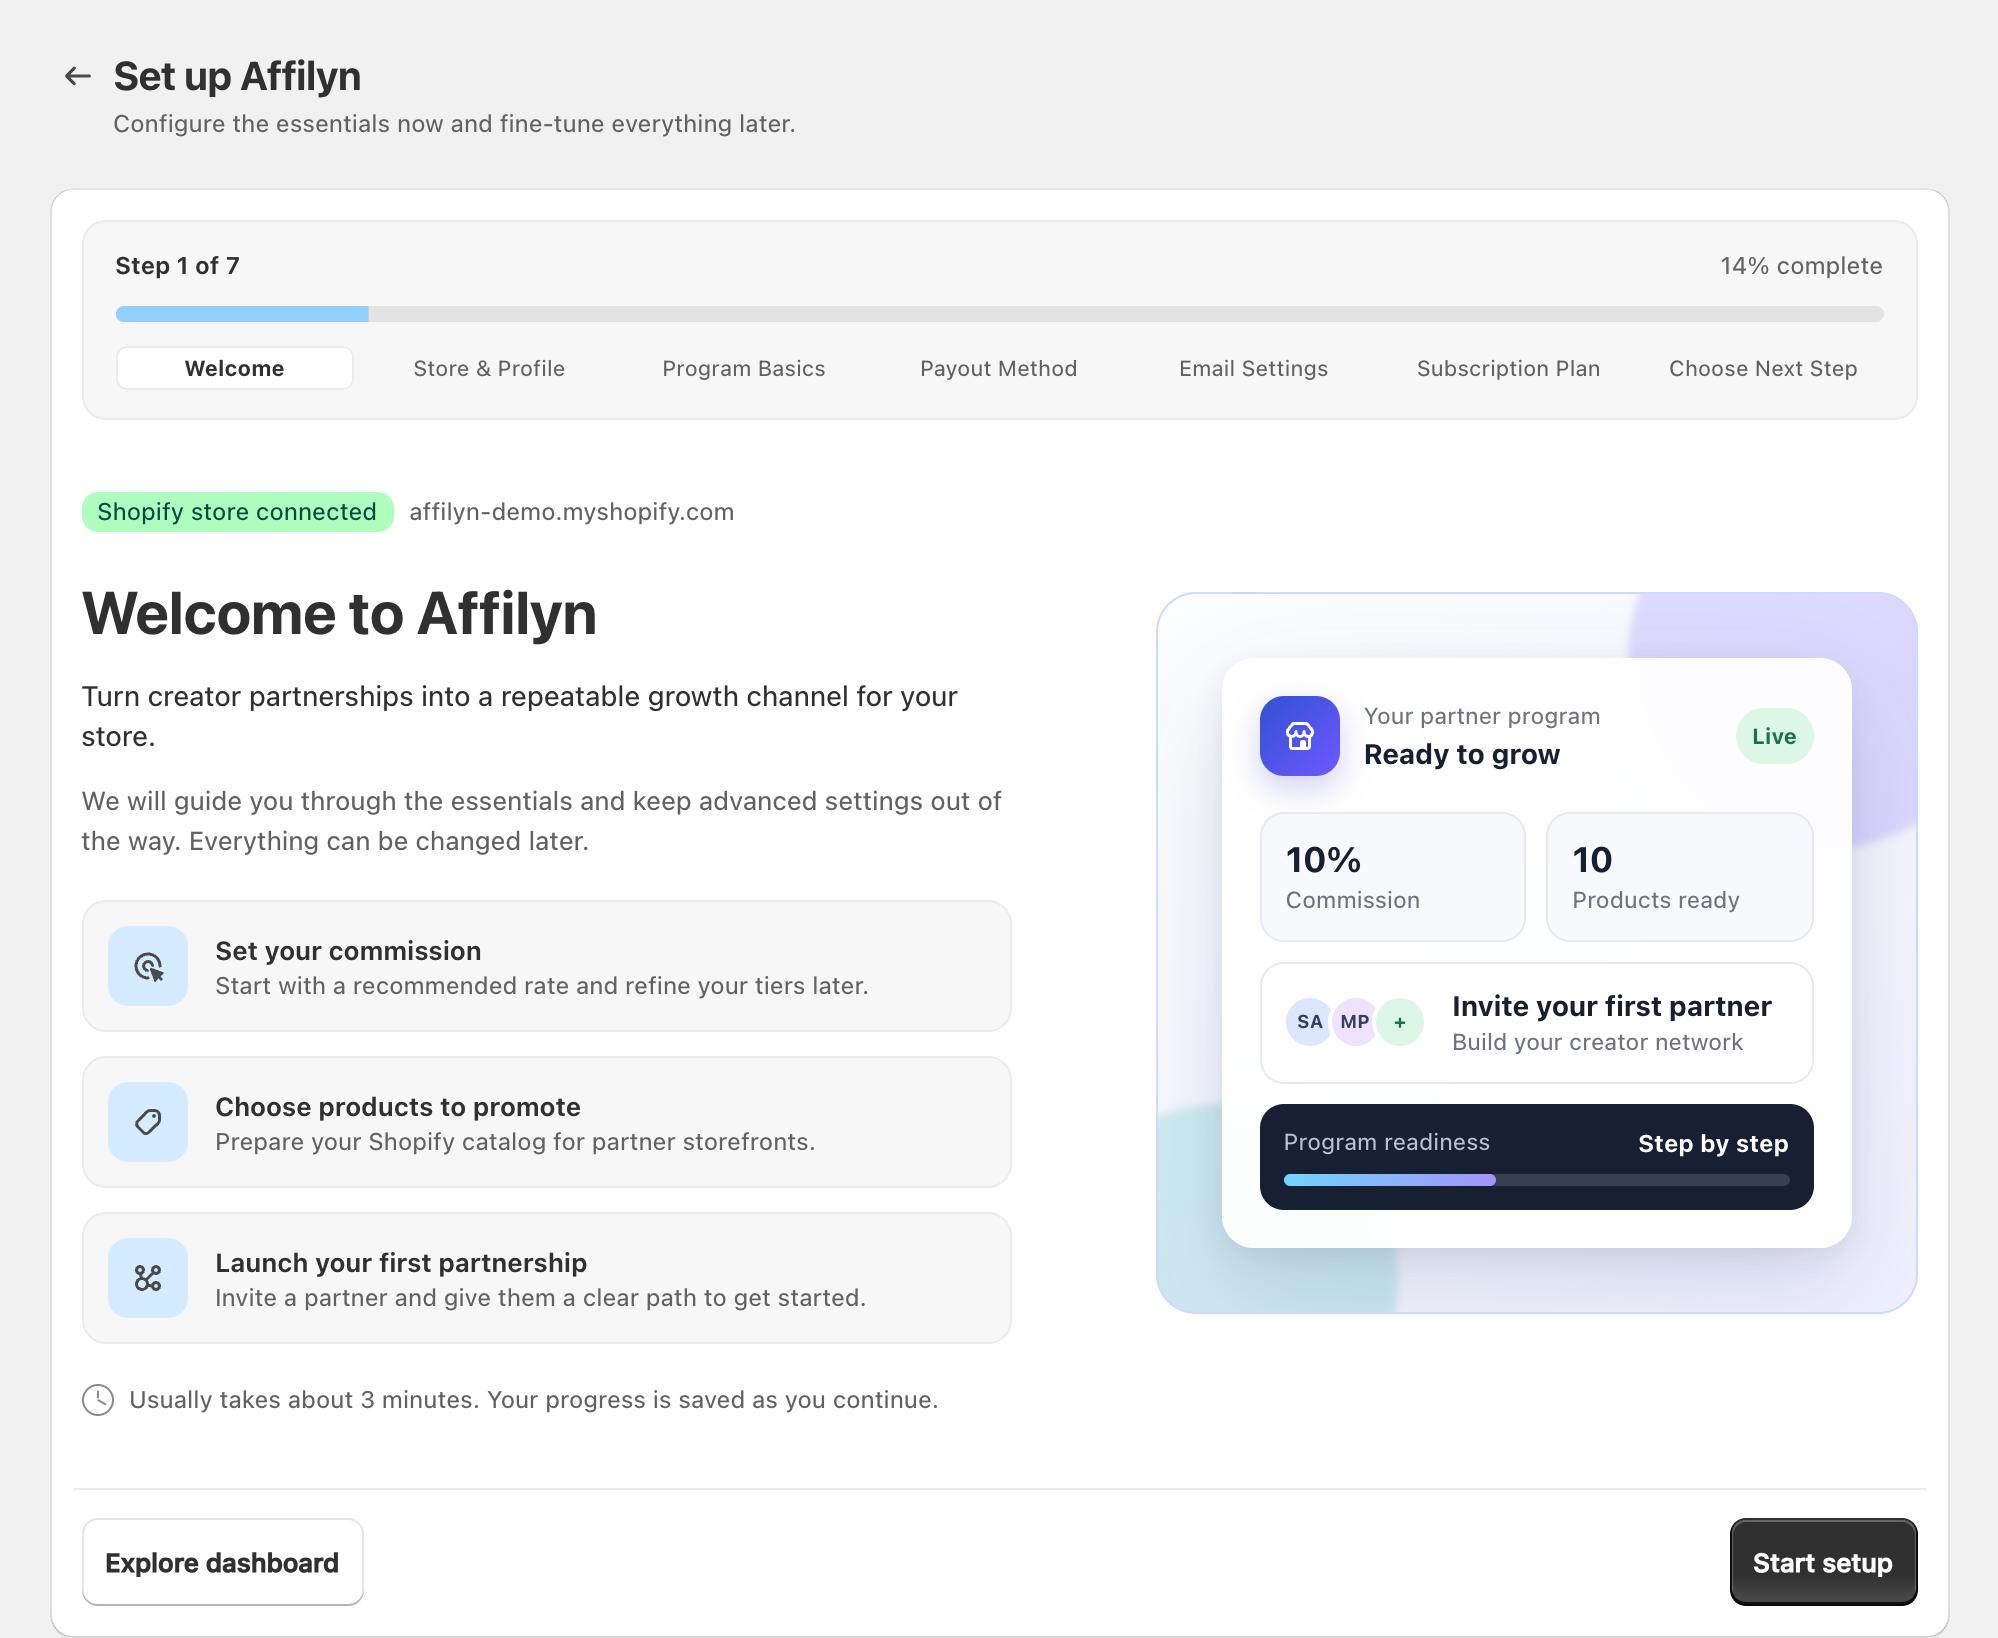
View full-size image: Setup wizard welcome
Step 3
If you skipped it earlier, return from the dashboard and select Continue setup.
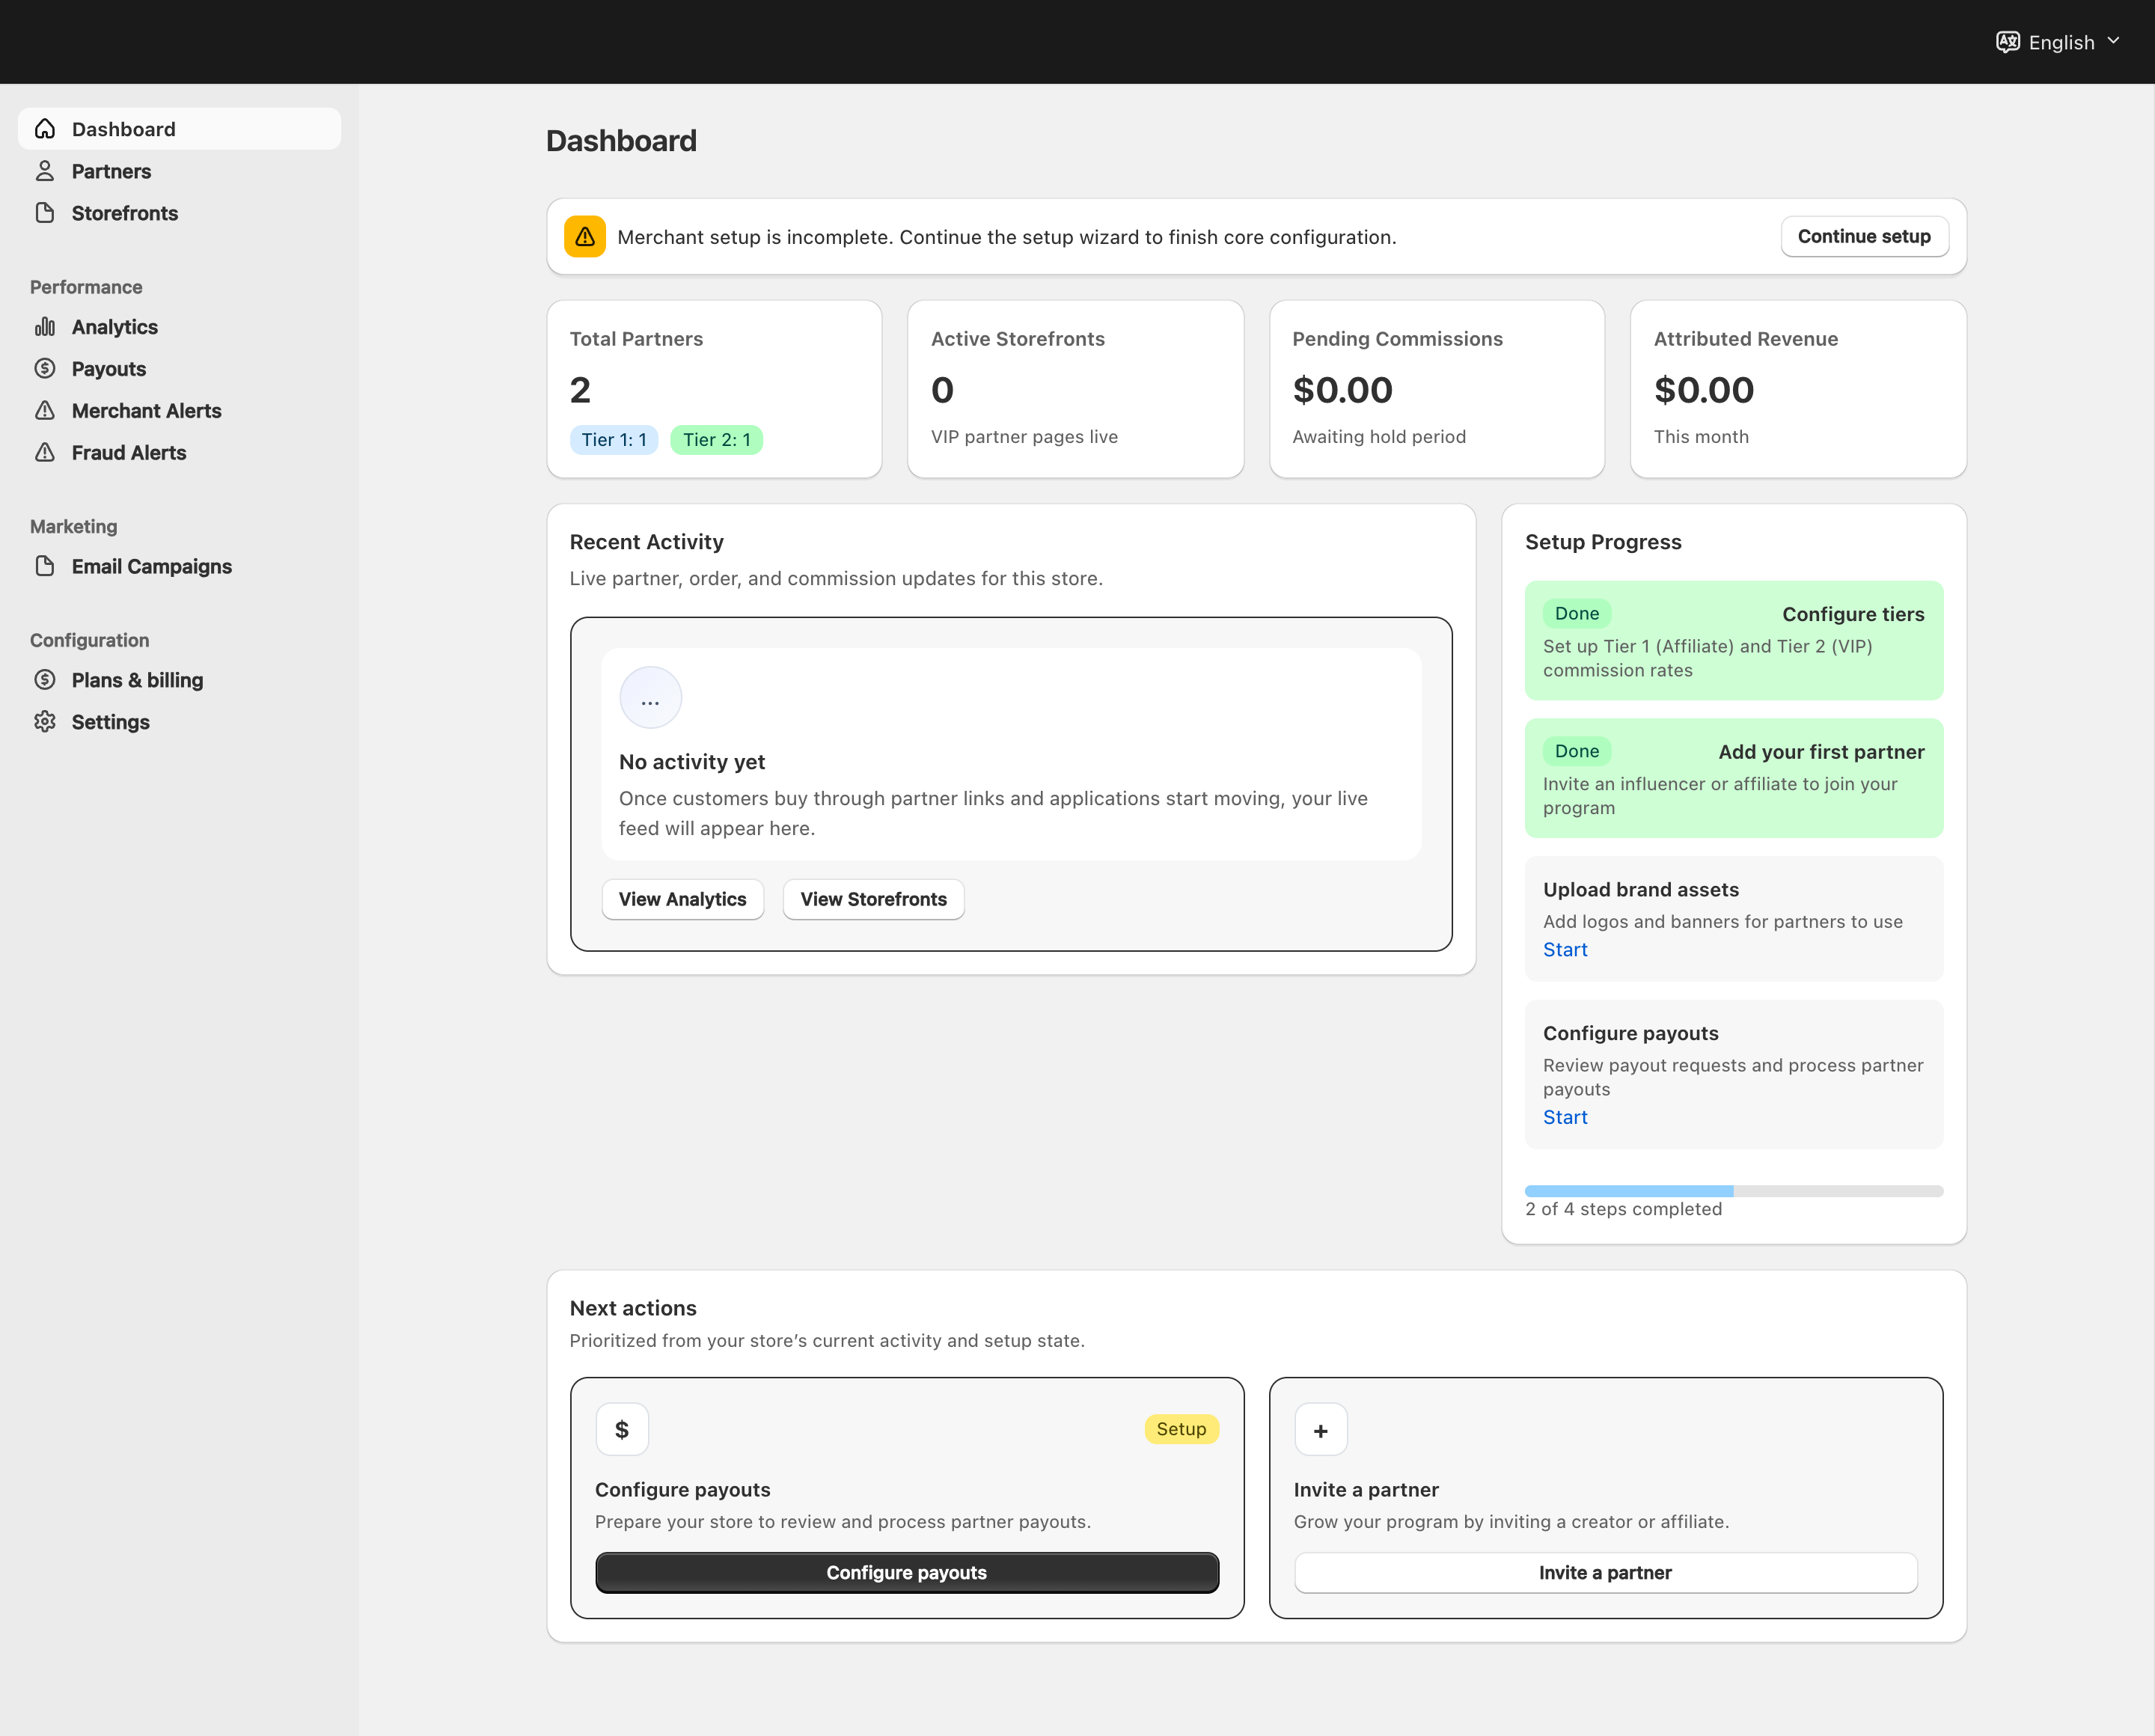
View full-size image: Merchant dashboard and navigation
Step 4
Move through each step in order, starting with your business details.
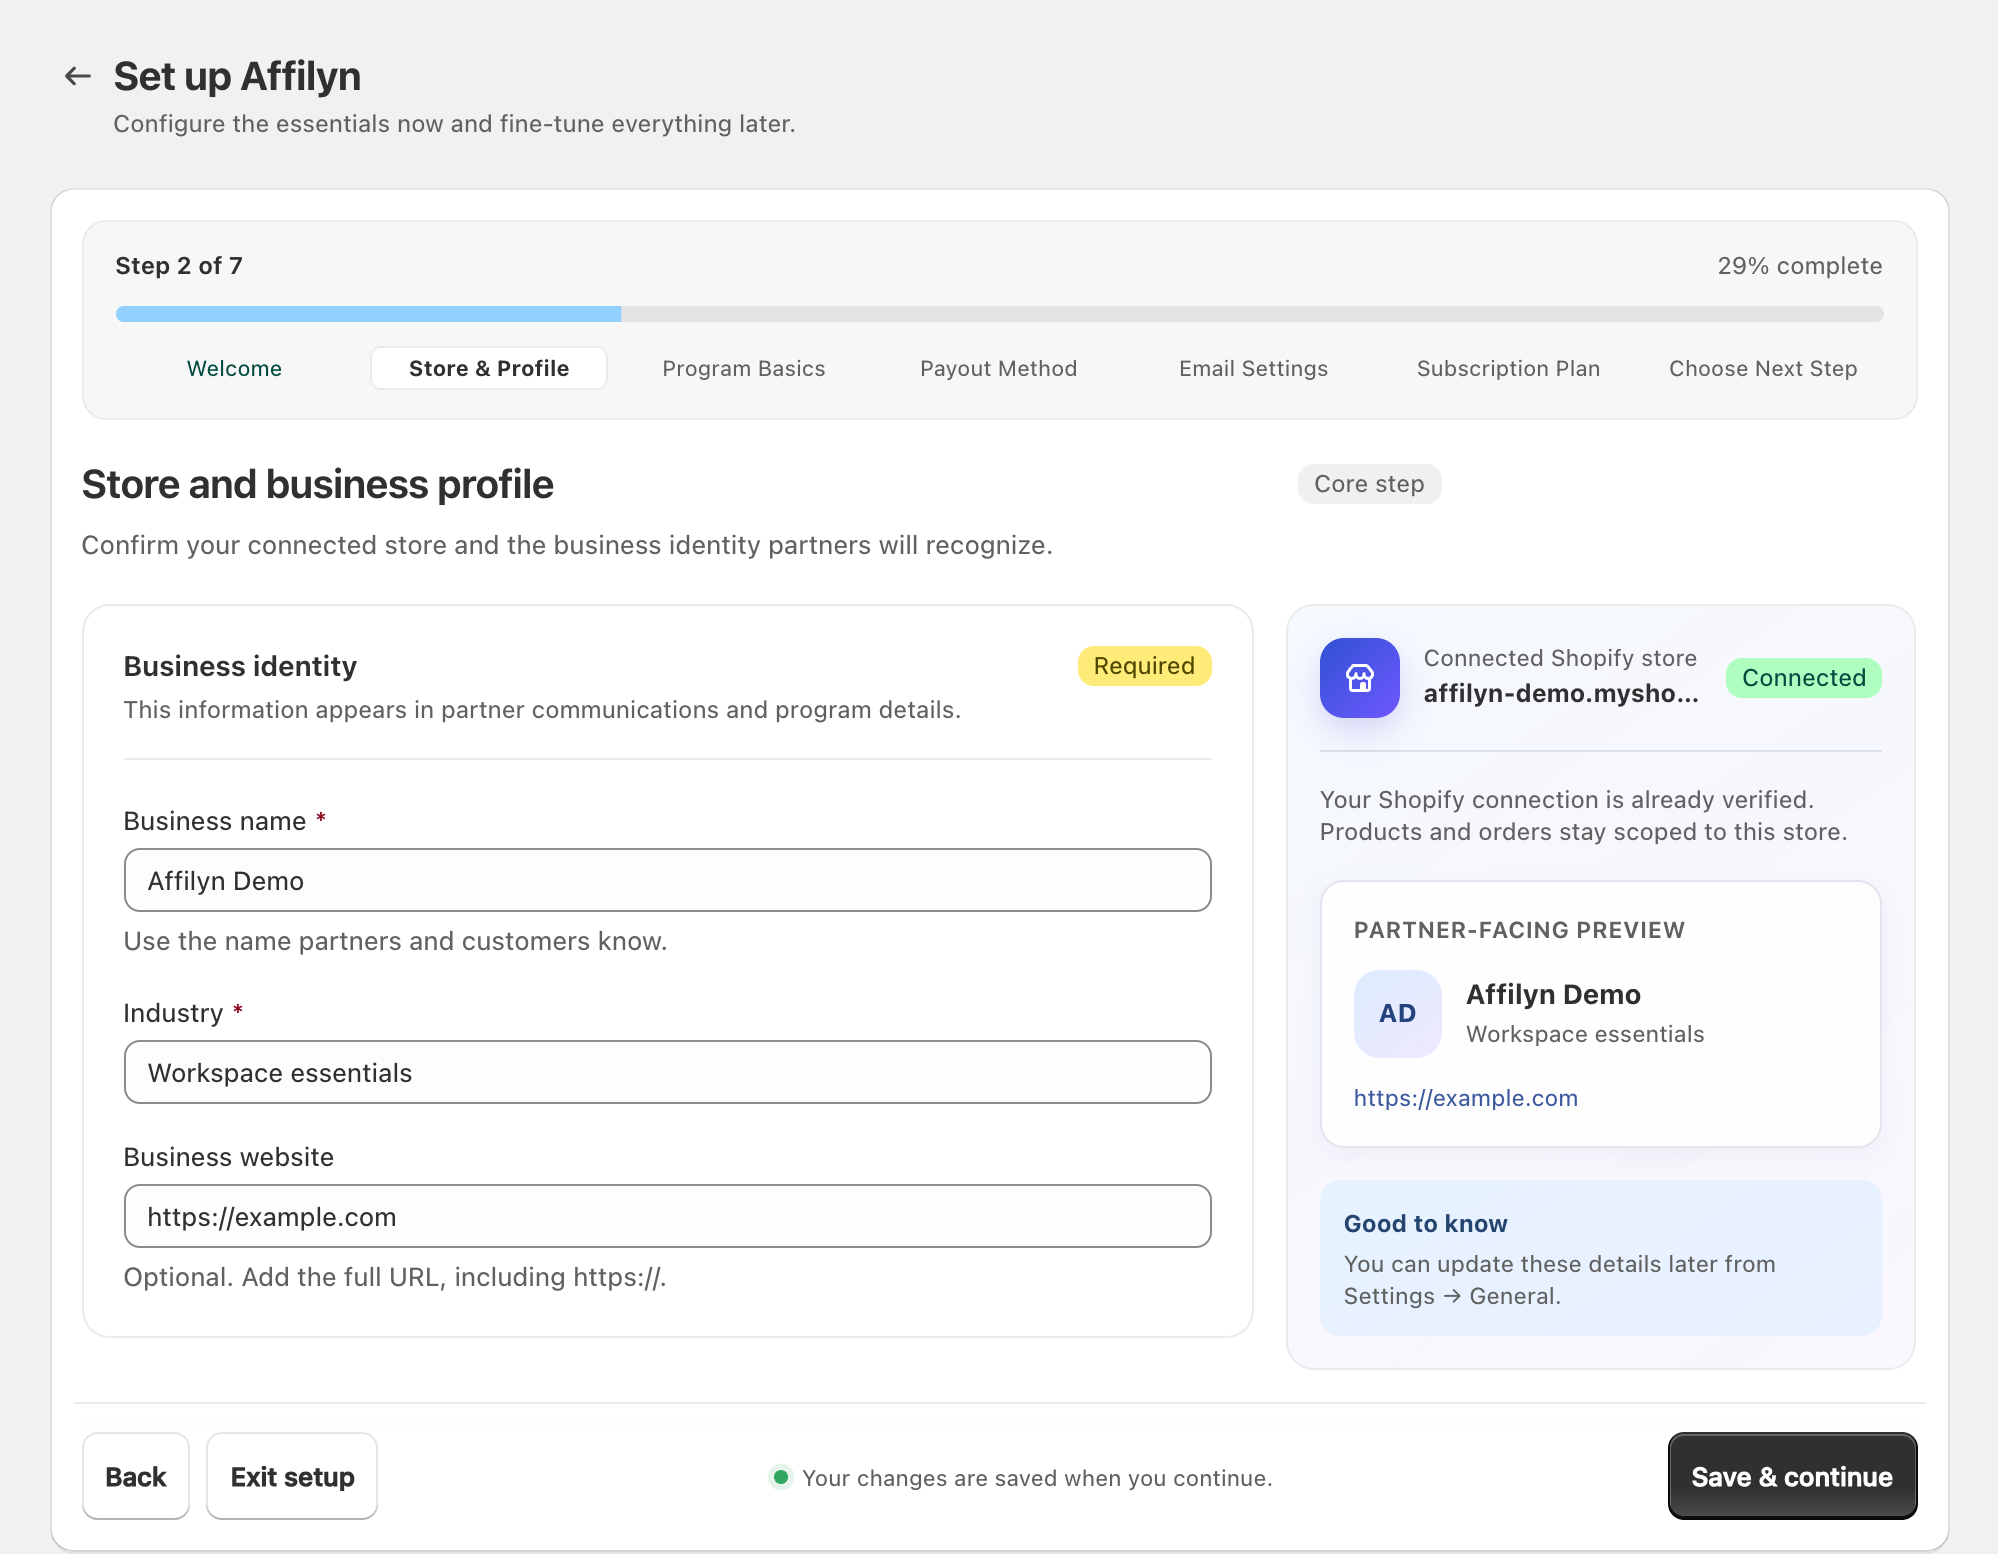
View full-size image: Store and business profile
Step 5
Set your default commission.
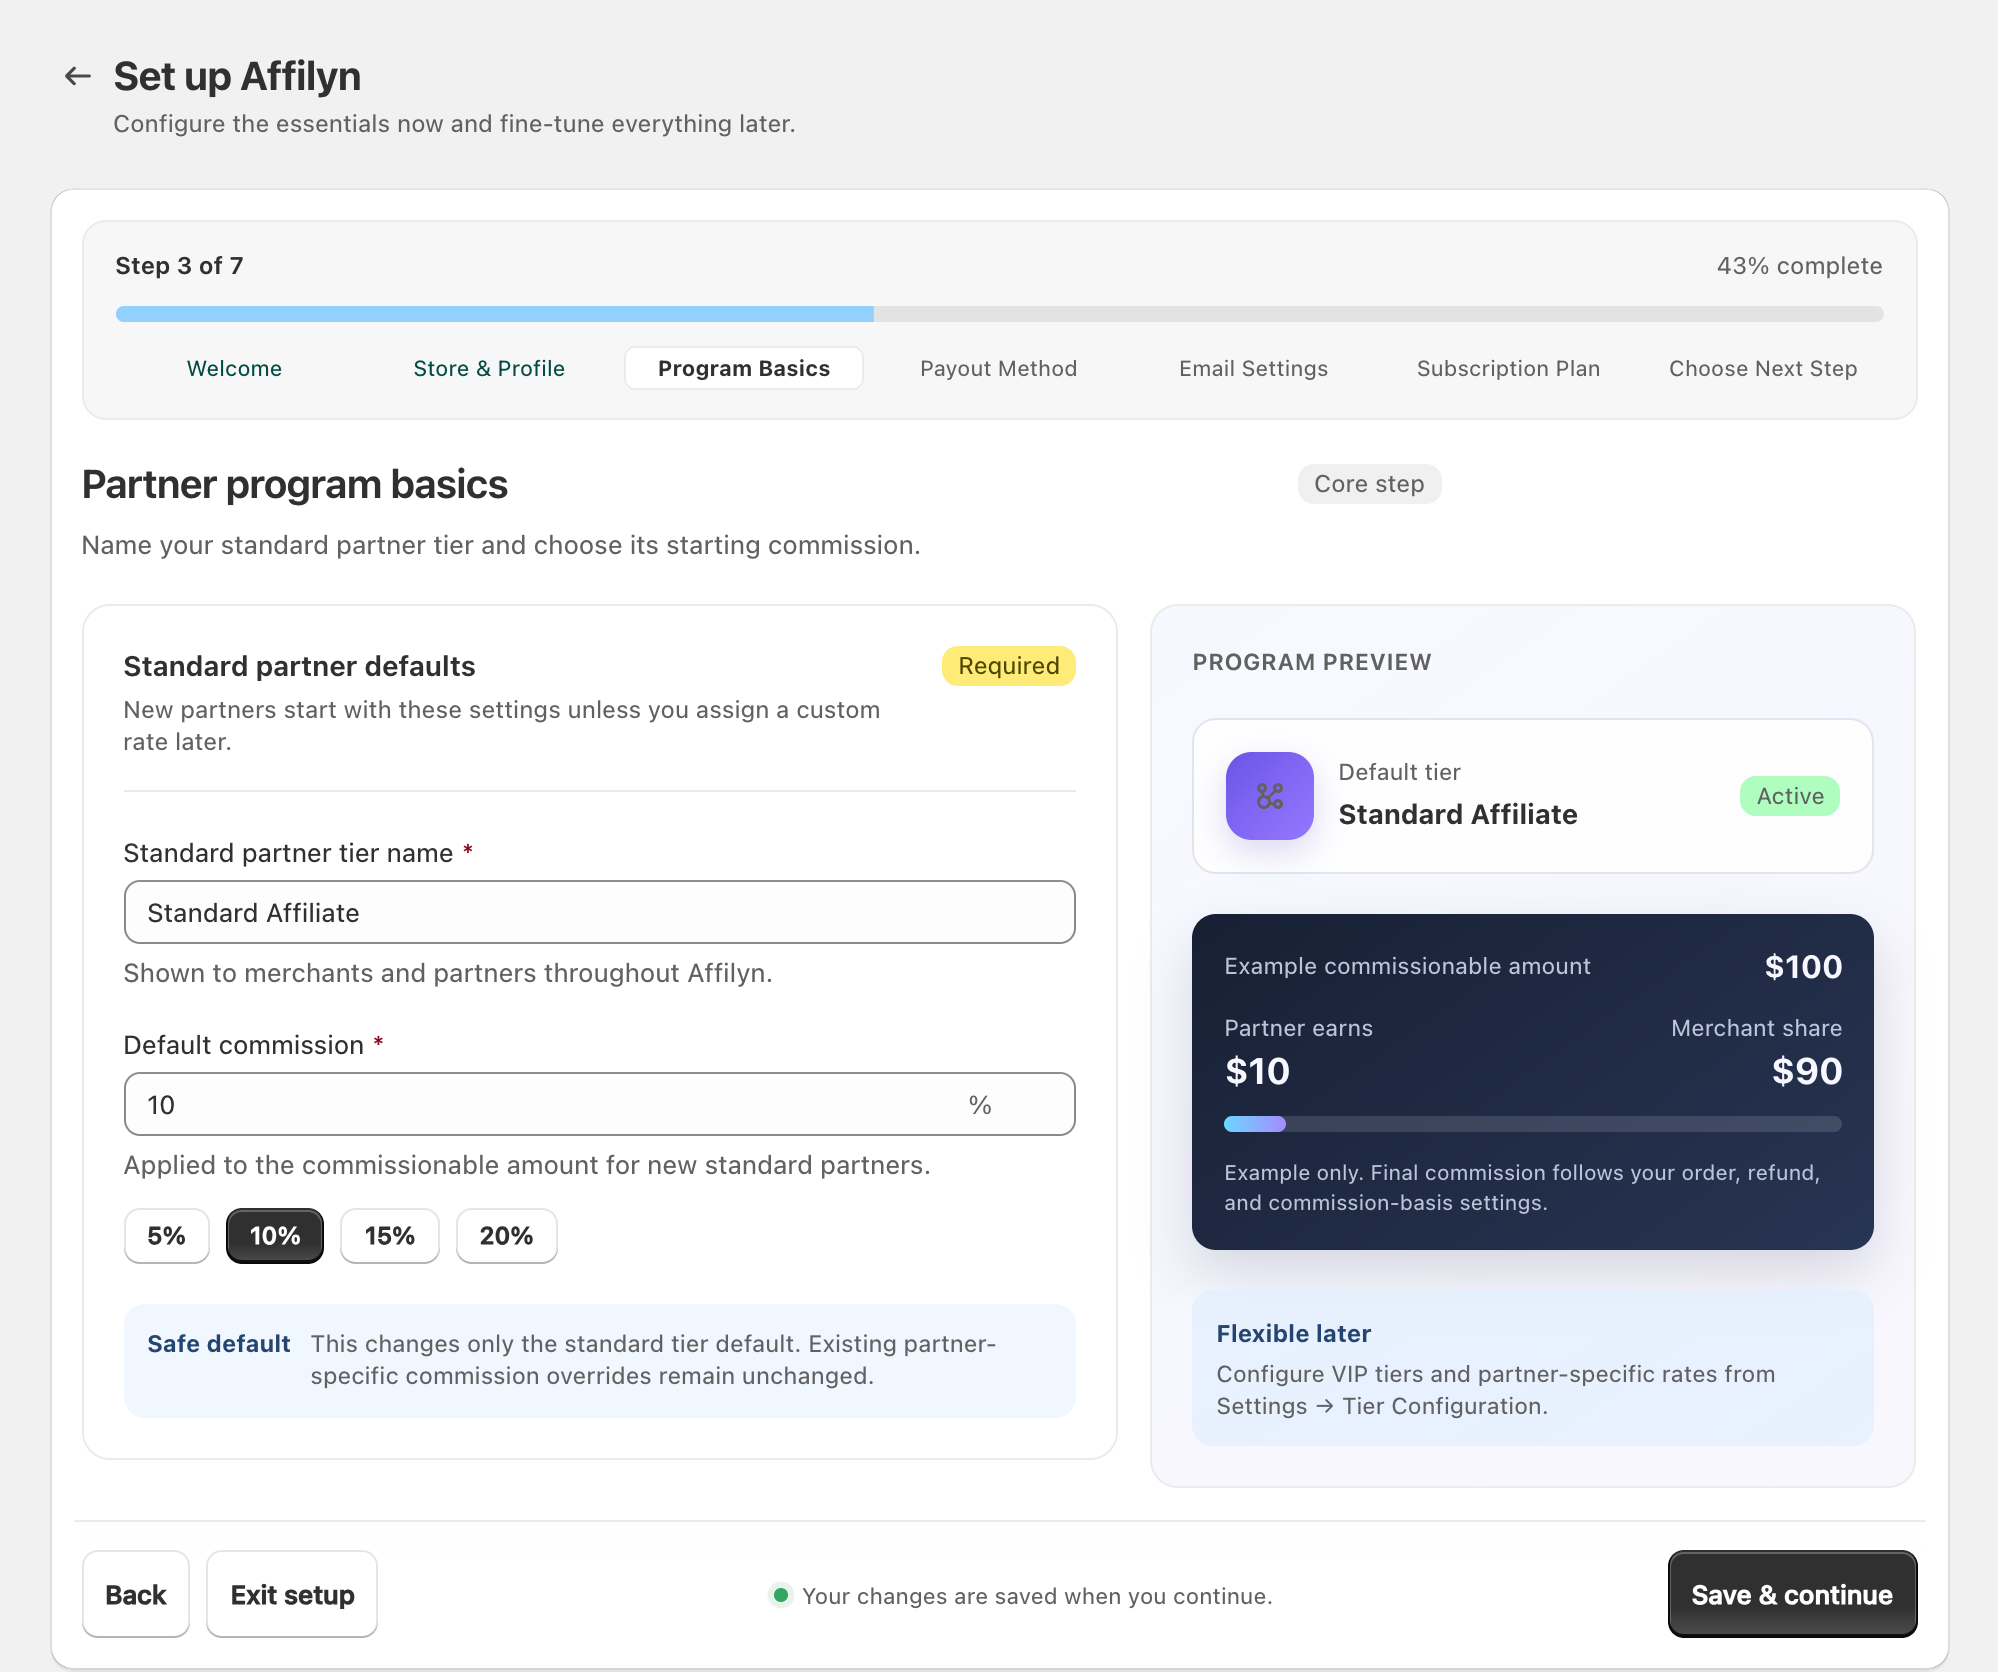
View full-size image: Partner program basics
Step 6
Review your payout method setup.
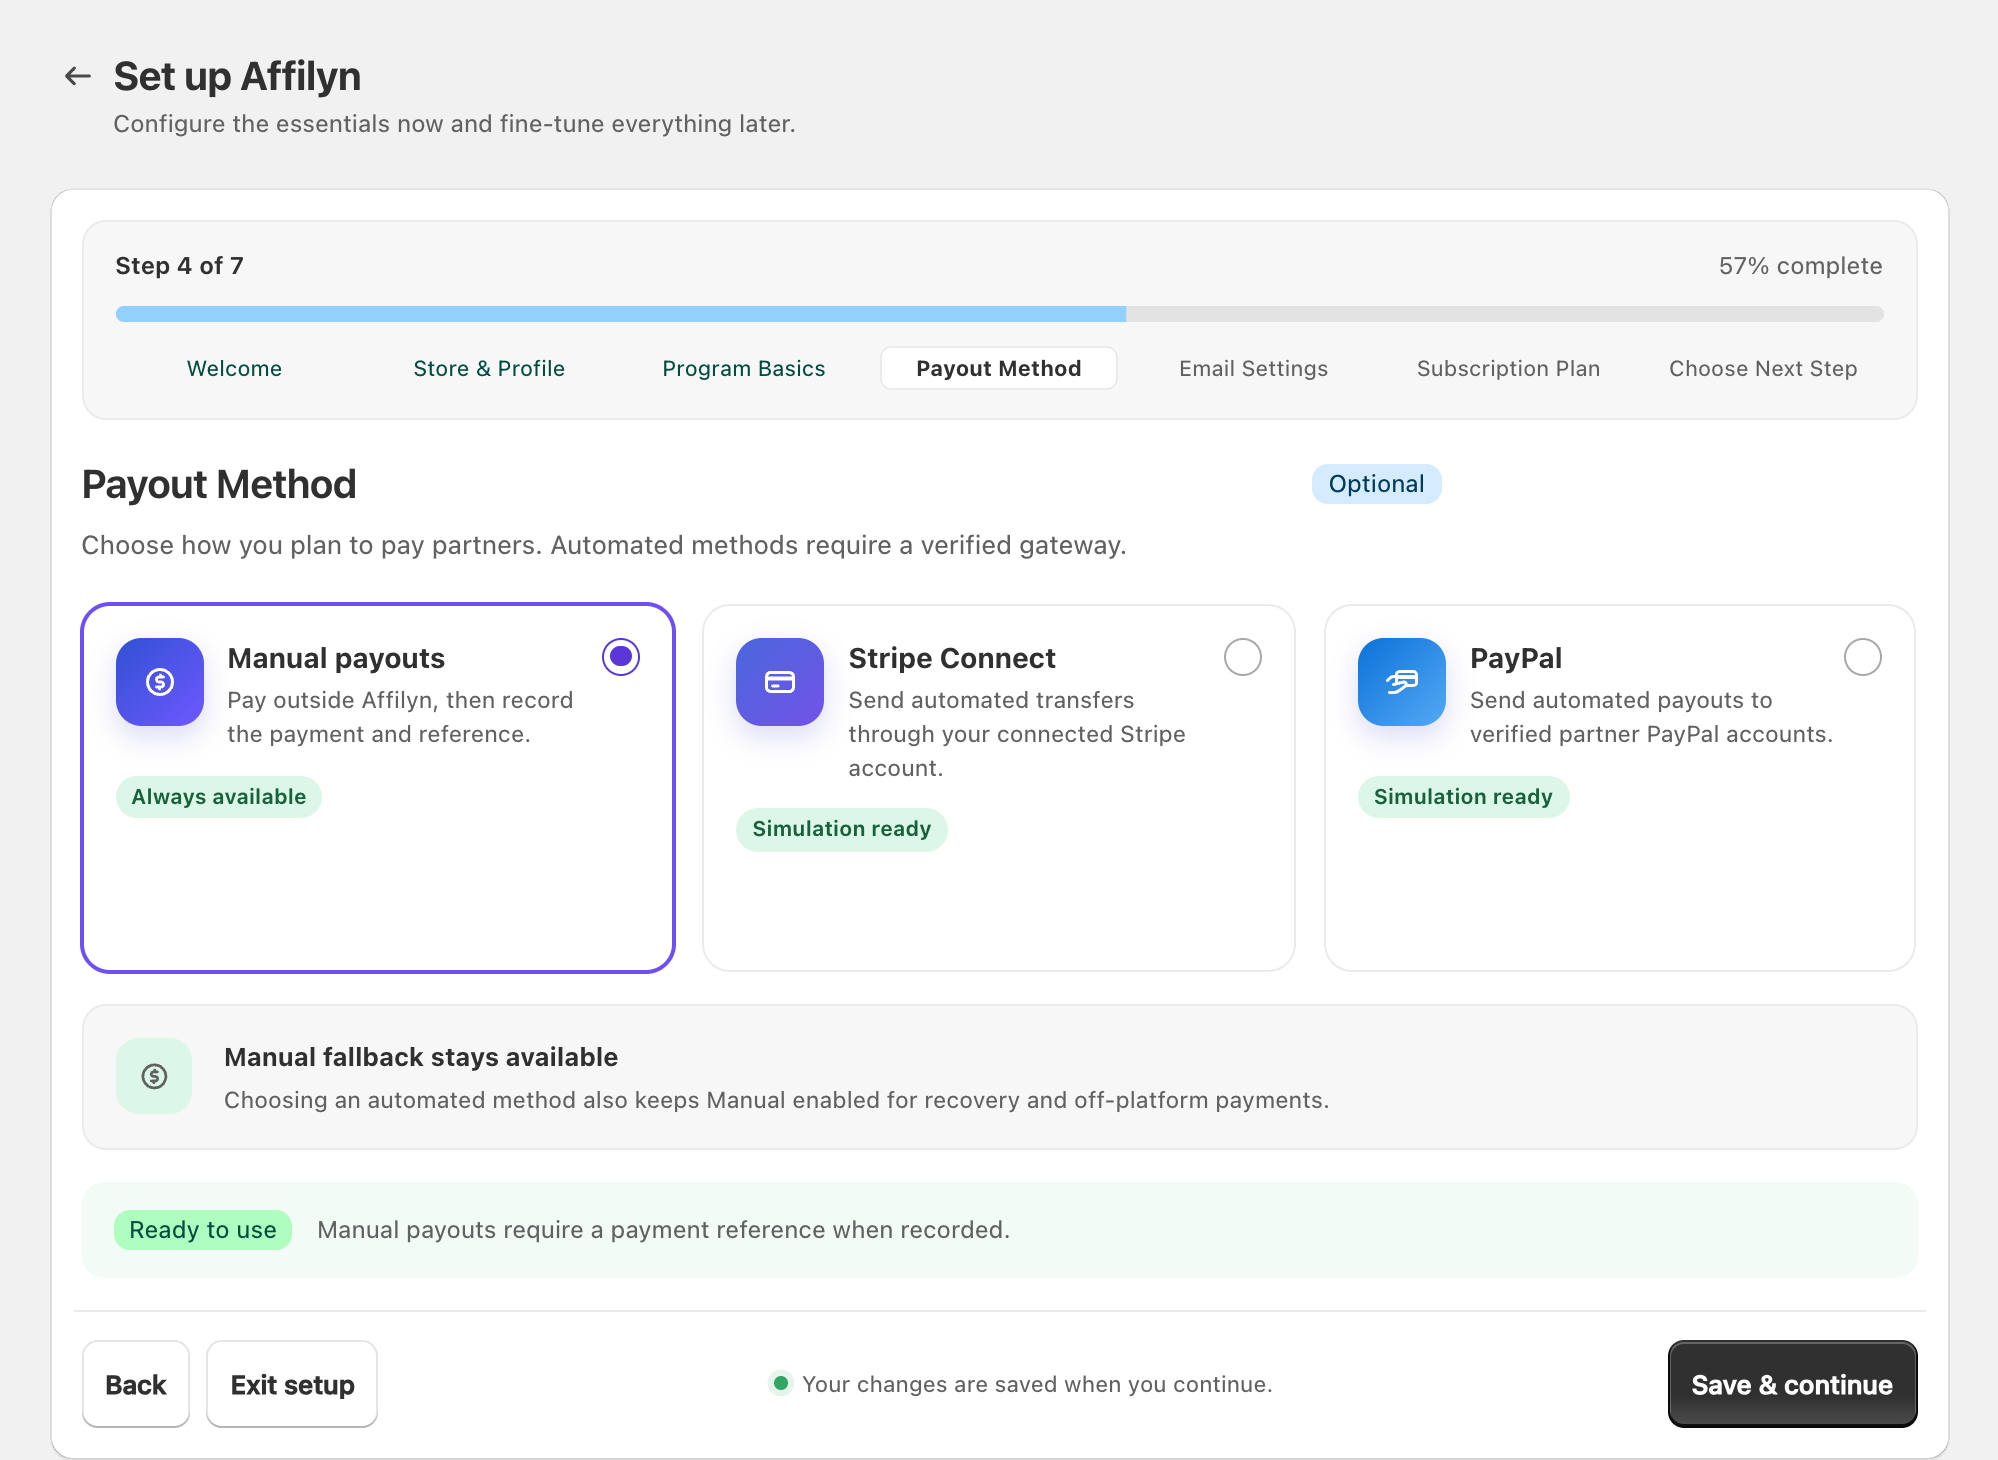
View full-size image: Wizard payout-method choice
Step 7
Add your email settings.
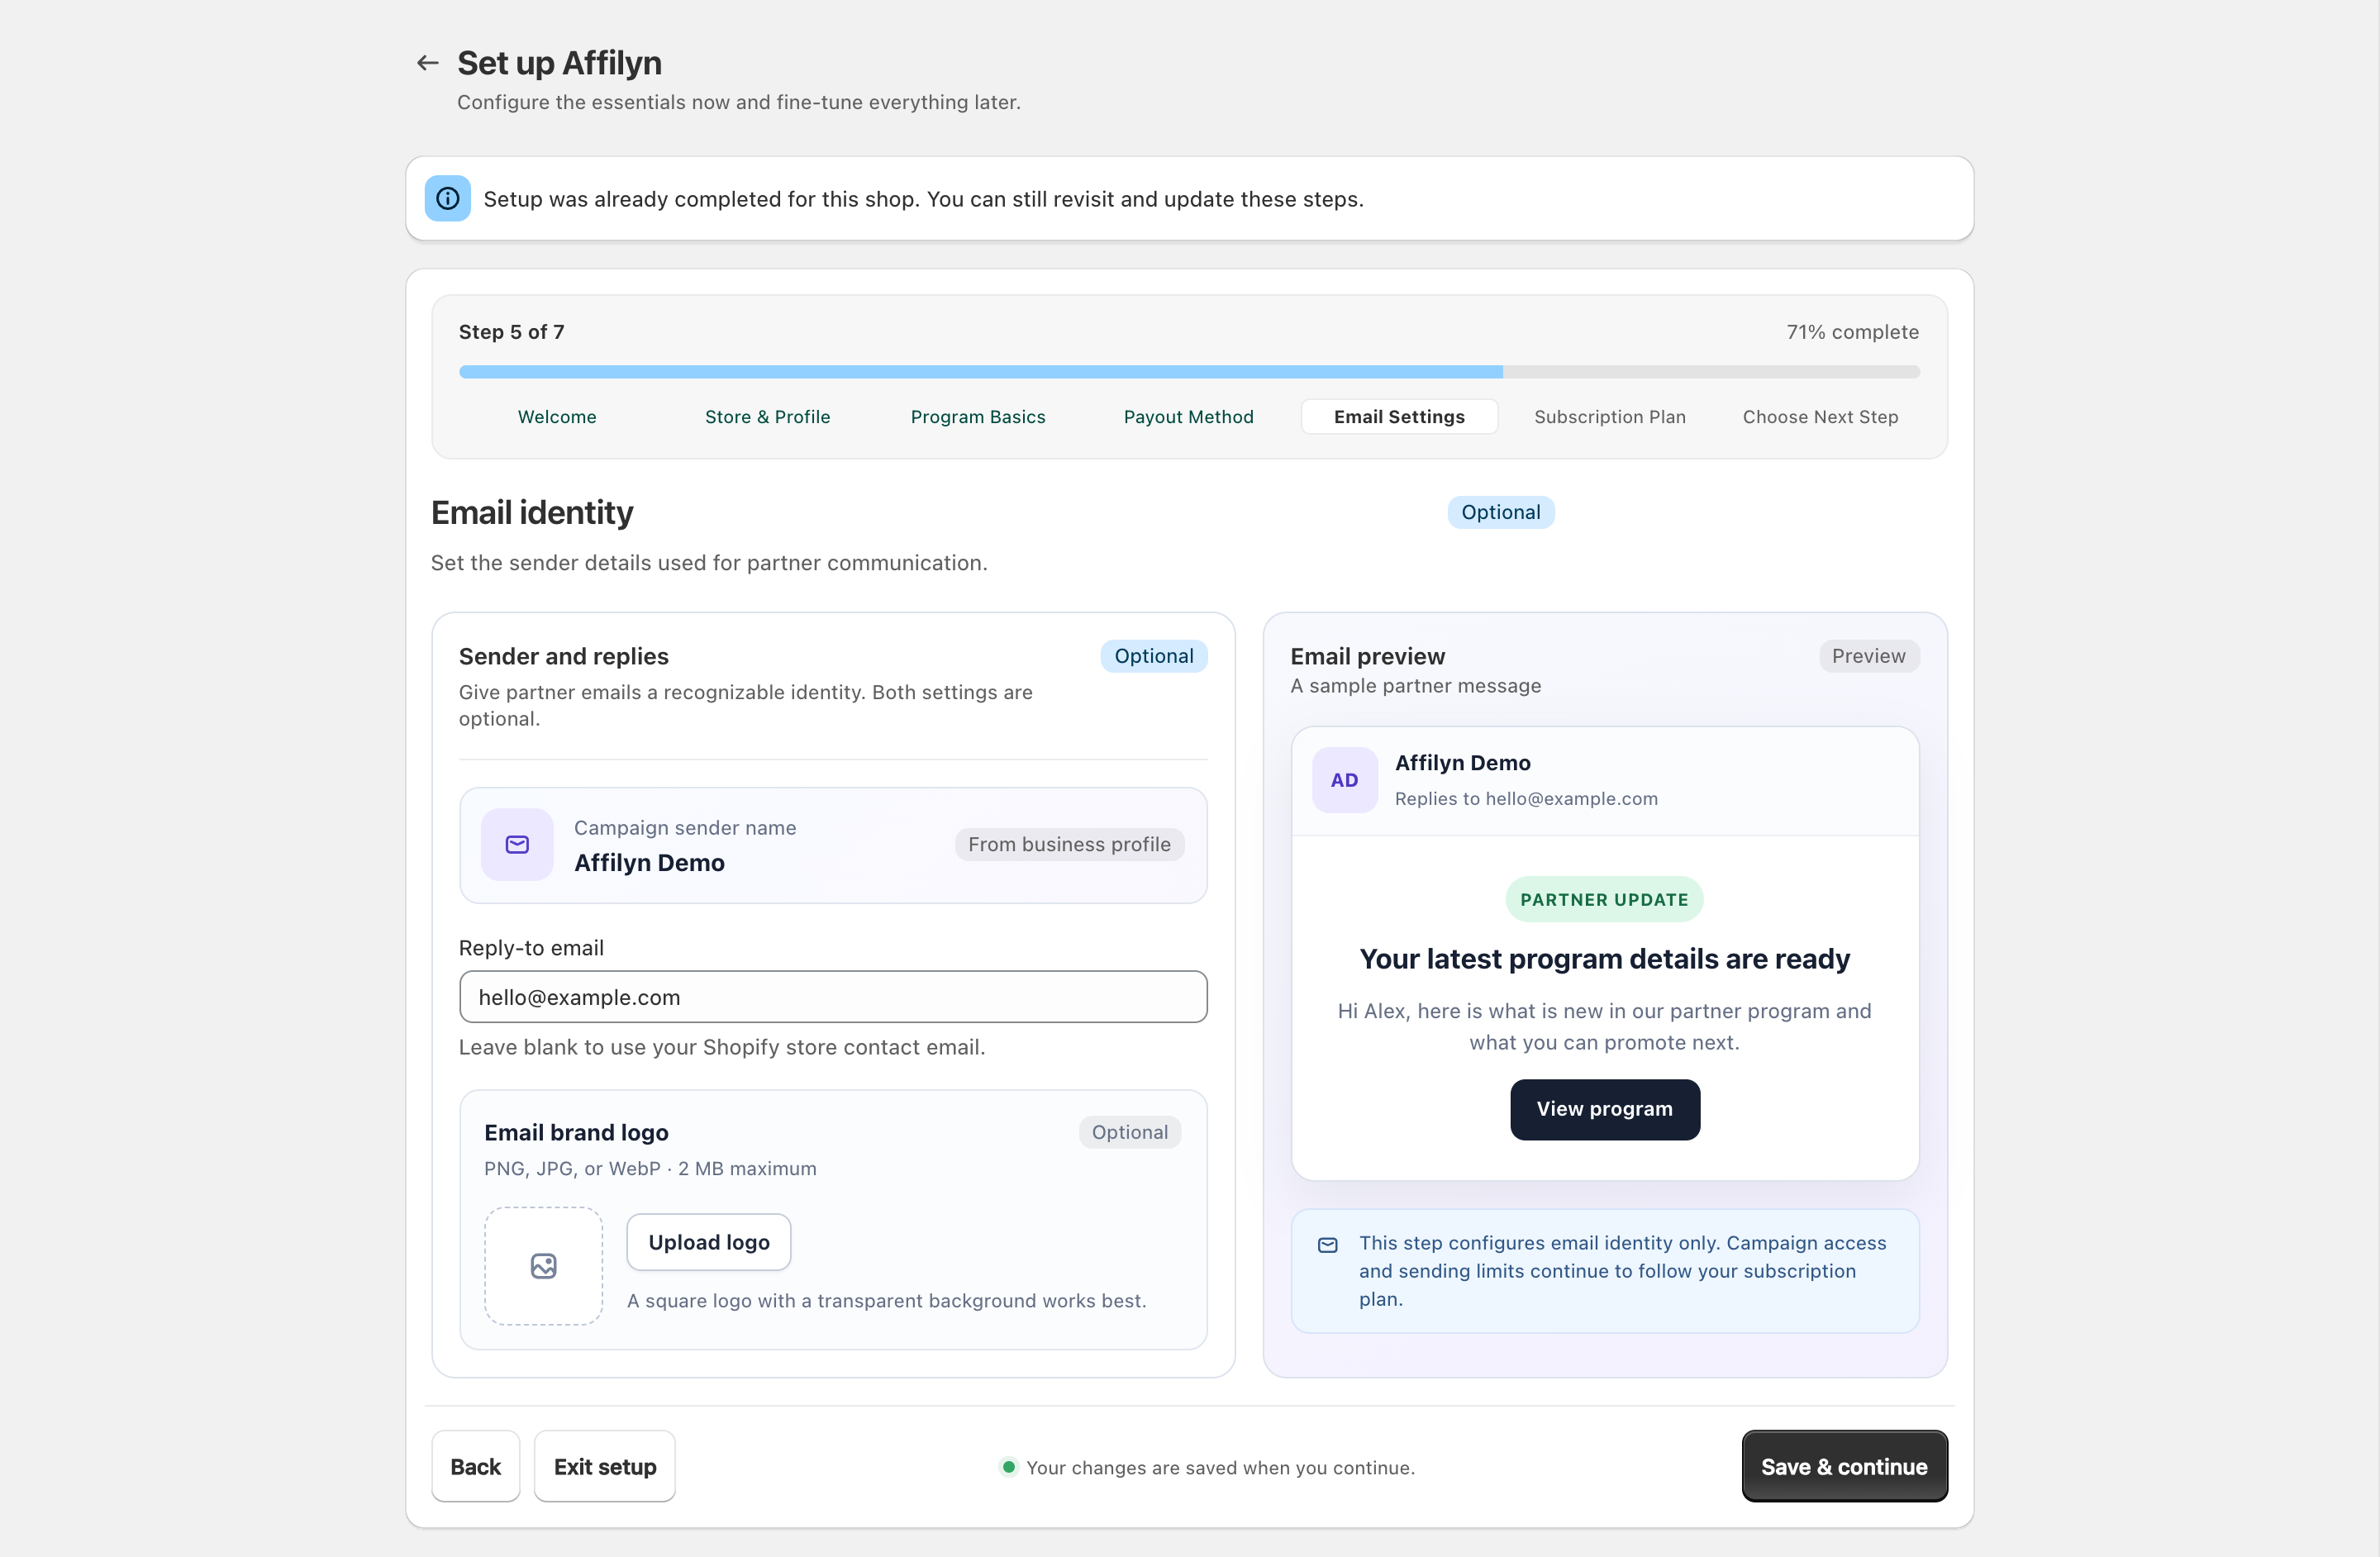
View full-size image: Email settings step
Step 8
Review the subscription step, then use Plans & billing to compare free access with the four paid plans. Choose Monthly or Yearly, review the total charge, and approve the selected subscription through Shopify. An eligible merchant's first approved paid subscription includes a one-time 14-day trial. Every shop also retains the permanent Free Plan allowance of five active partners: four Standard Affiliates and one merchant-designated VIP with storefront access. Paid partner capacity is added on top of those five slots.
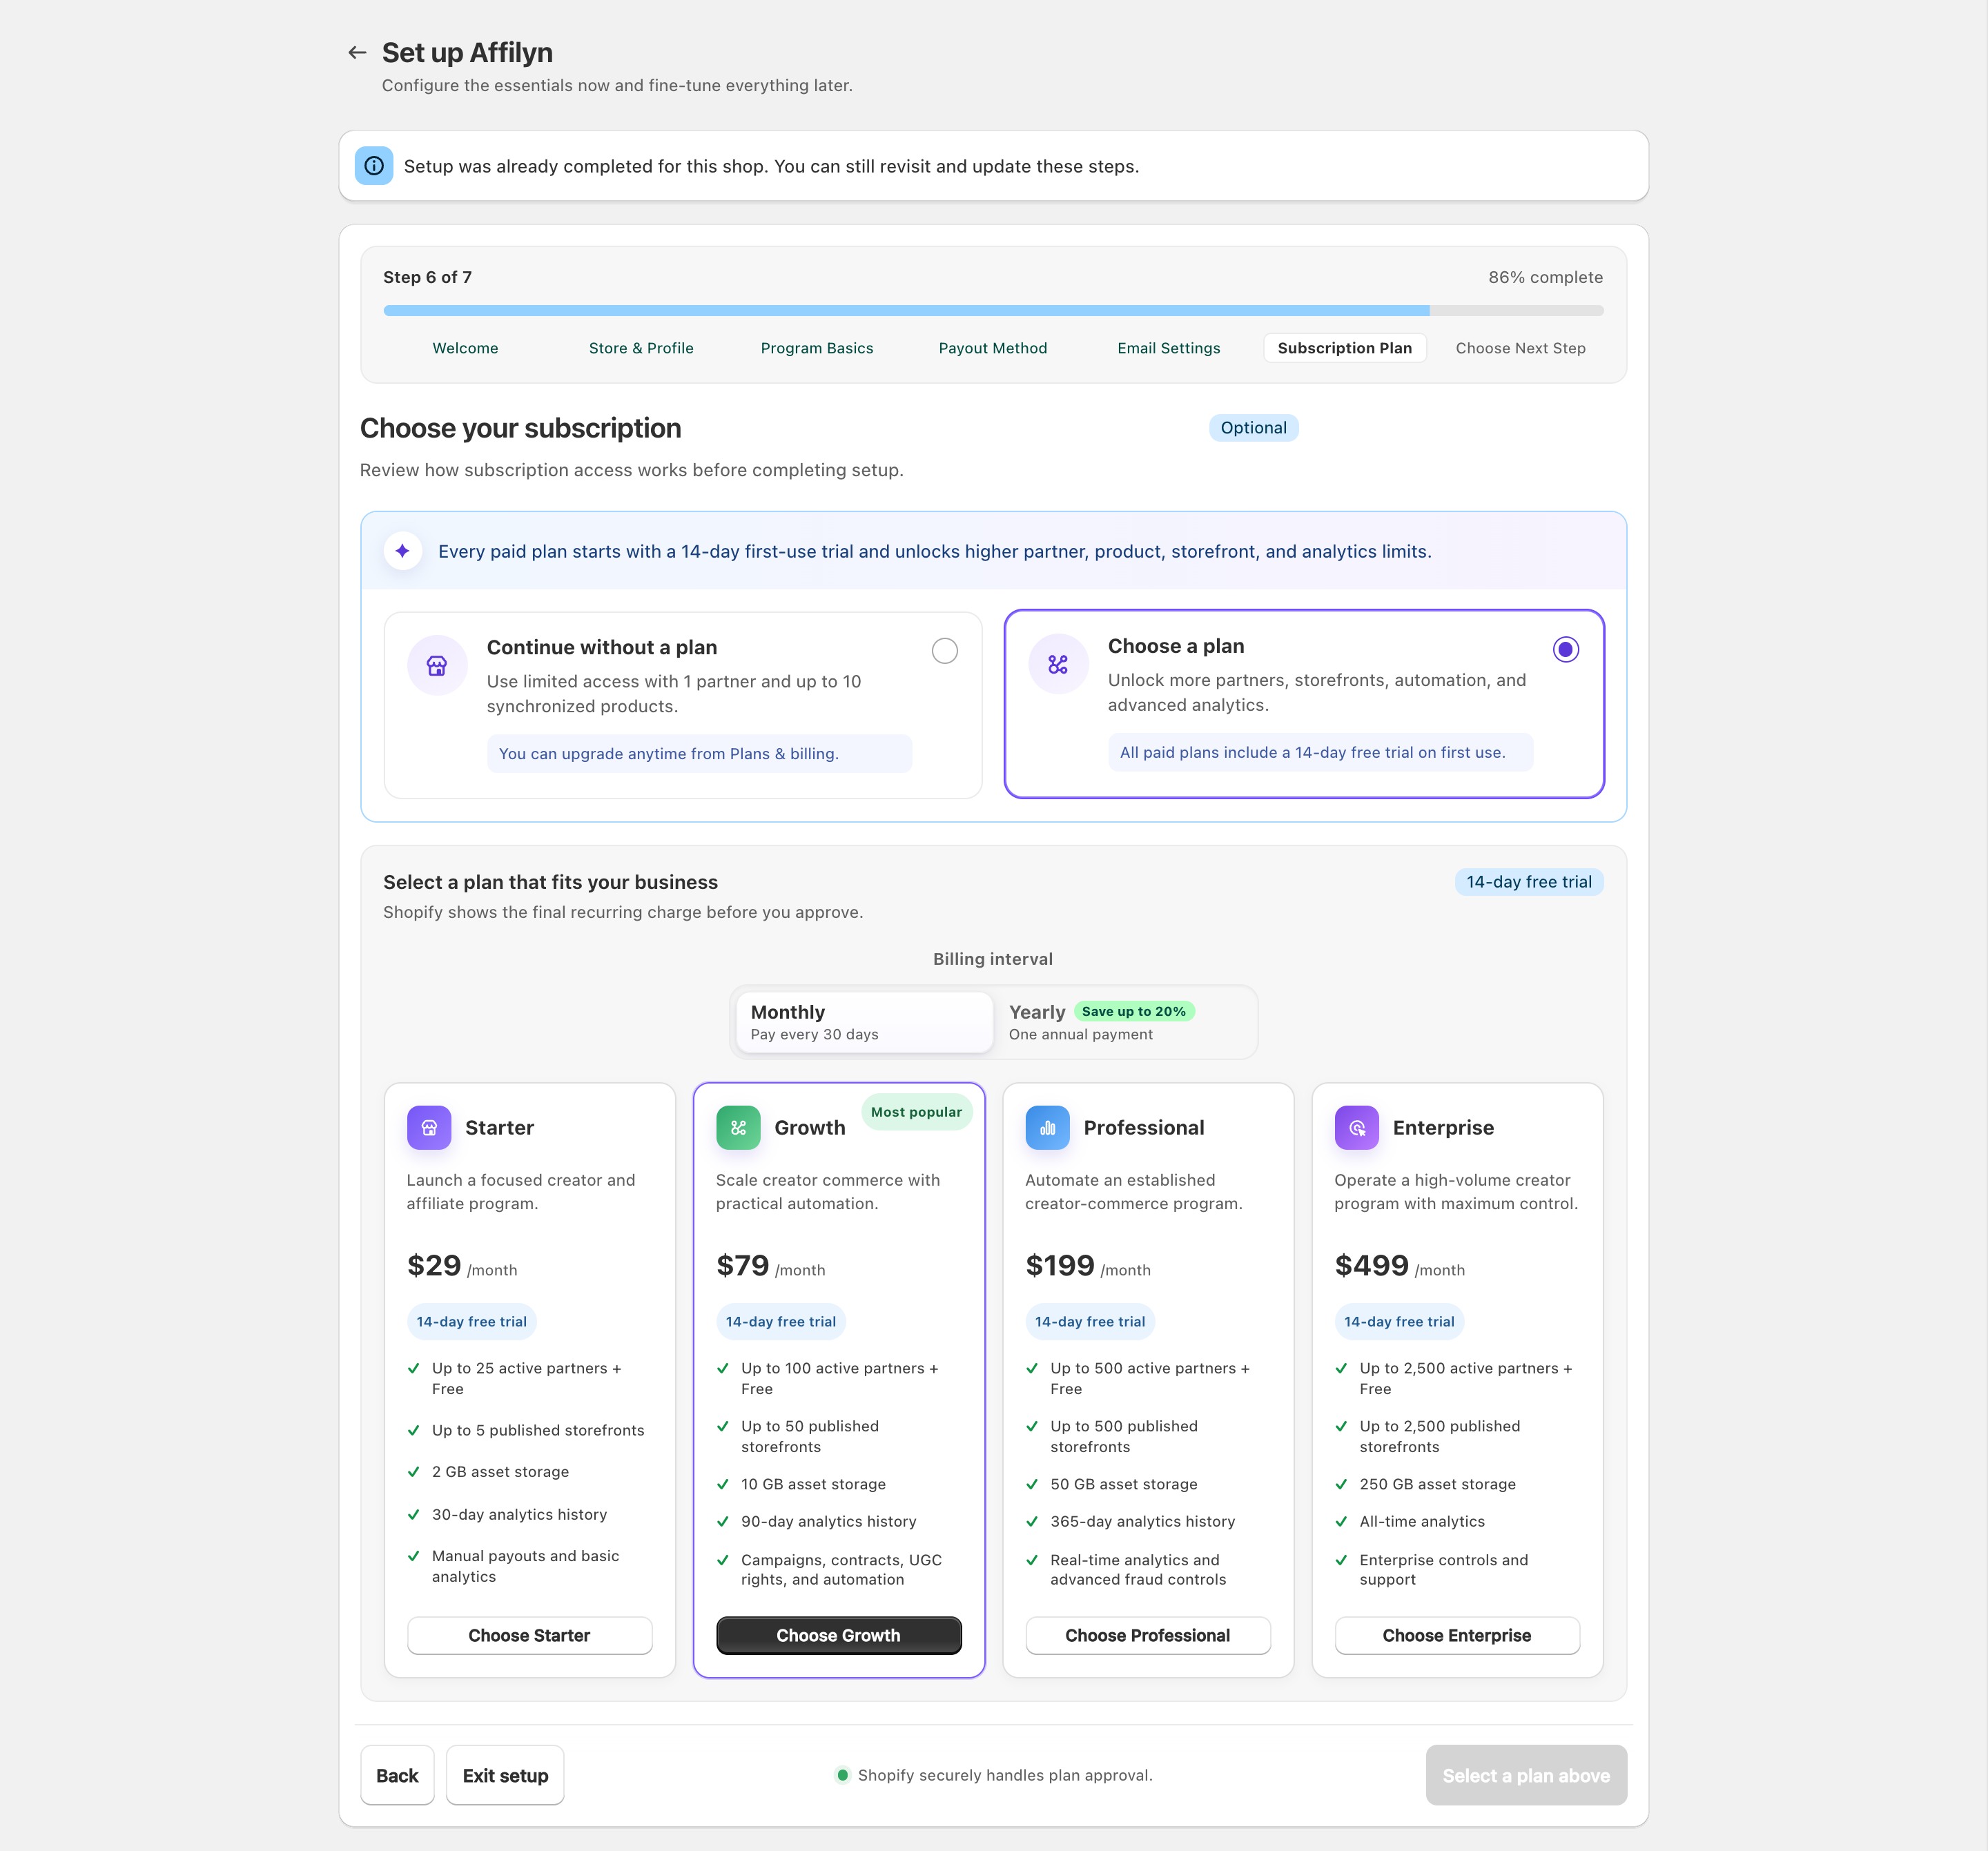
View full-size image: Wizard subscription comparison
Step 9
On Choose Next Step, review the saved store profile, partner program, payout workflow, email settings, and subscription access. Choose whether to continue to the dashboard, invite your first partner, or fine-tune settings, then complete setup.
Completing onboarding does not publish storefront elements, invite partners, or send messages automatically.
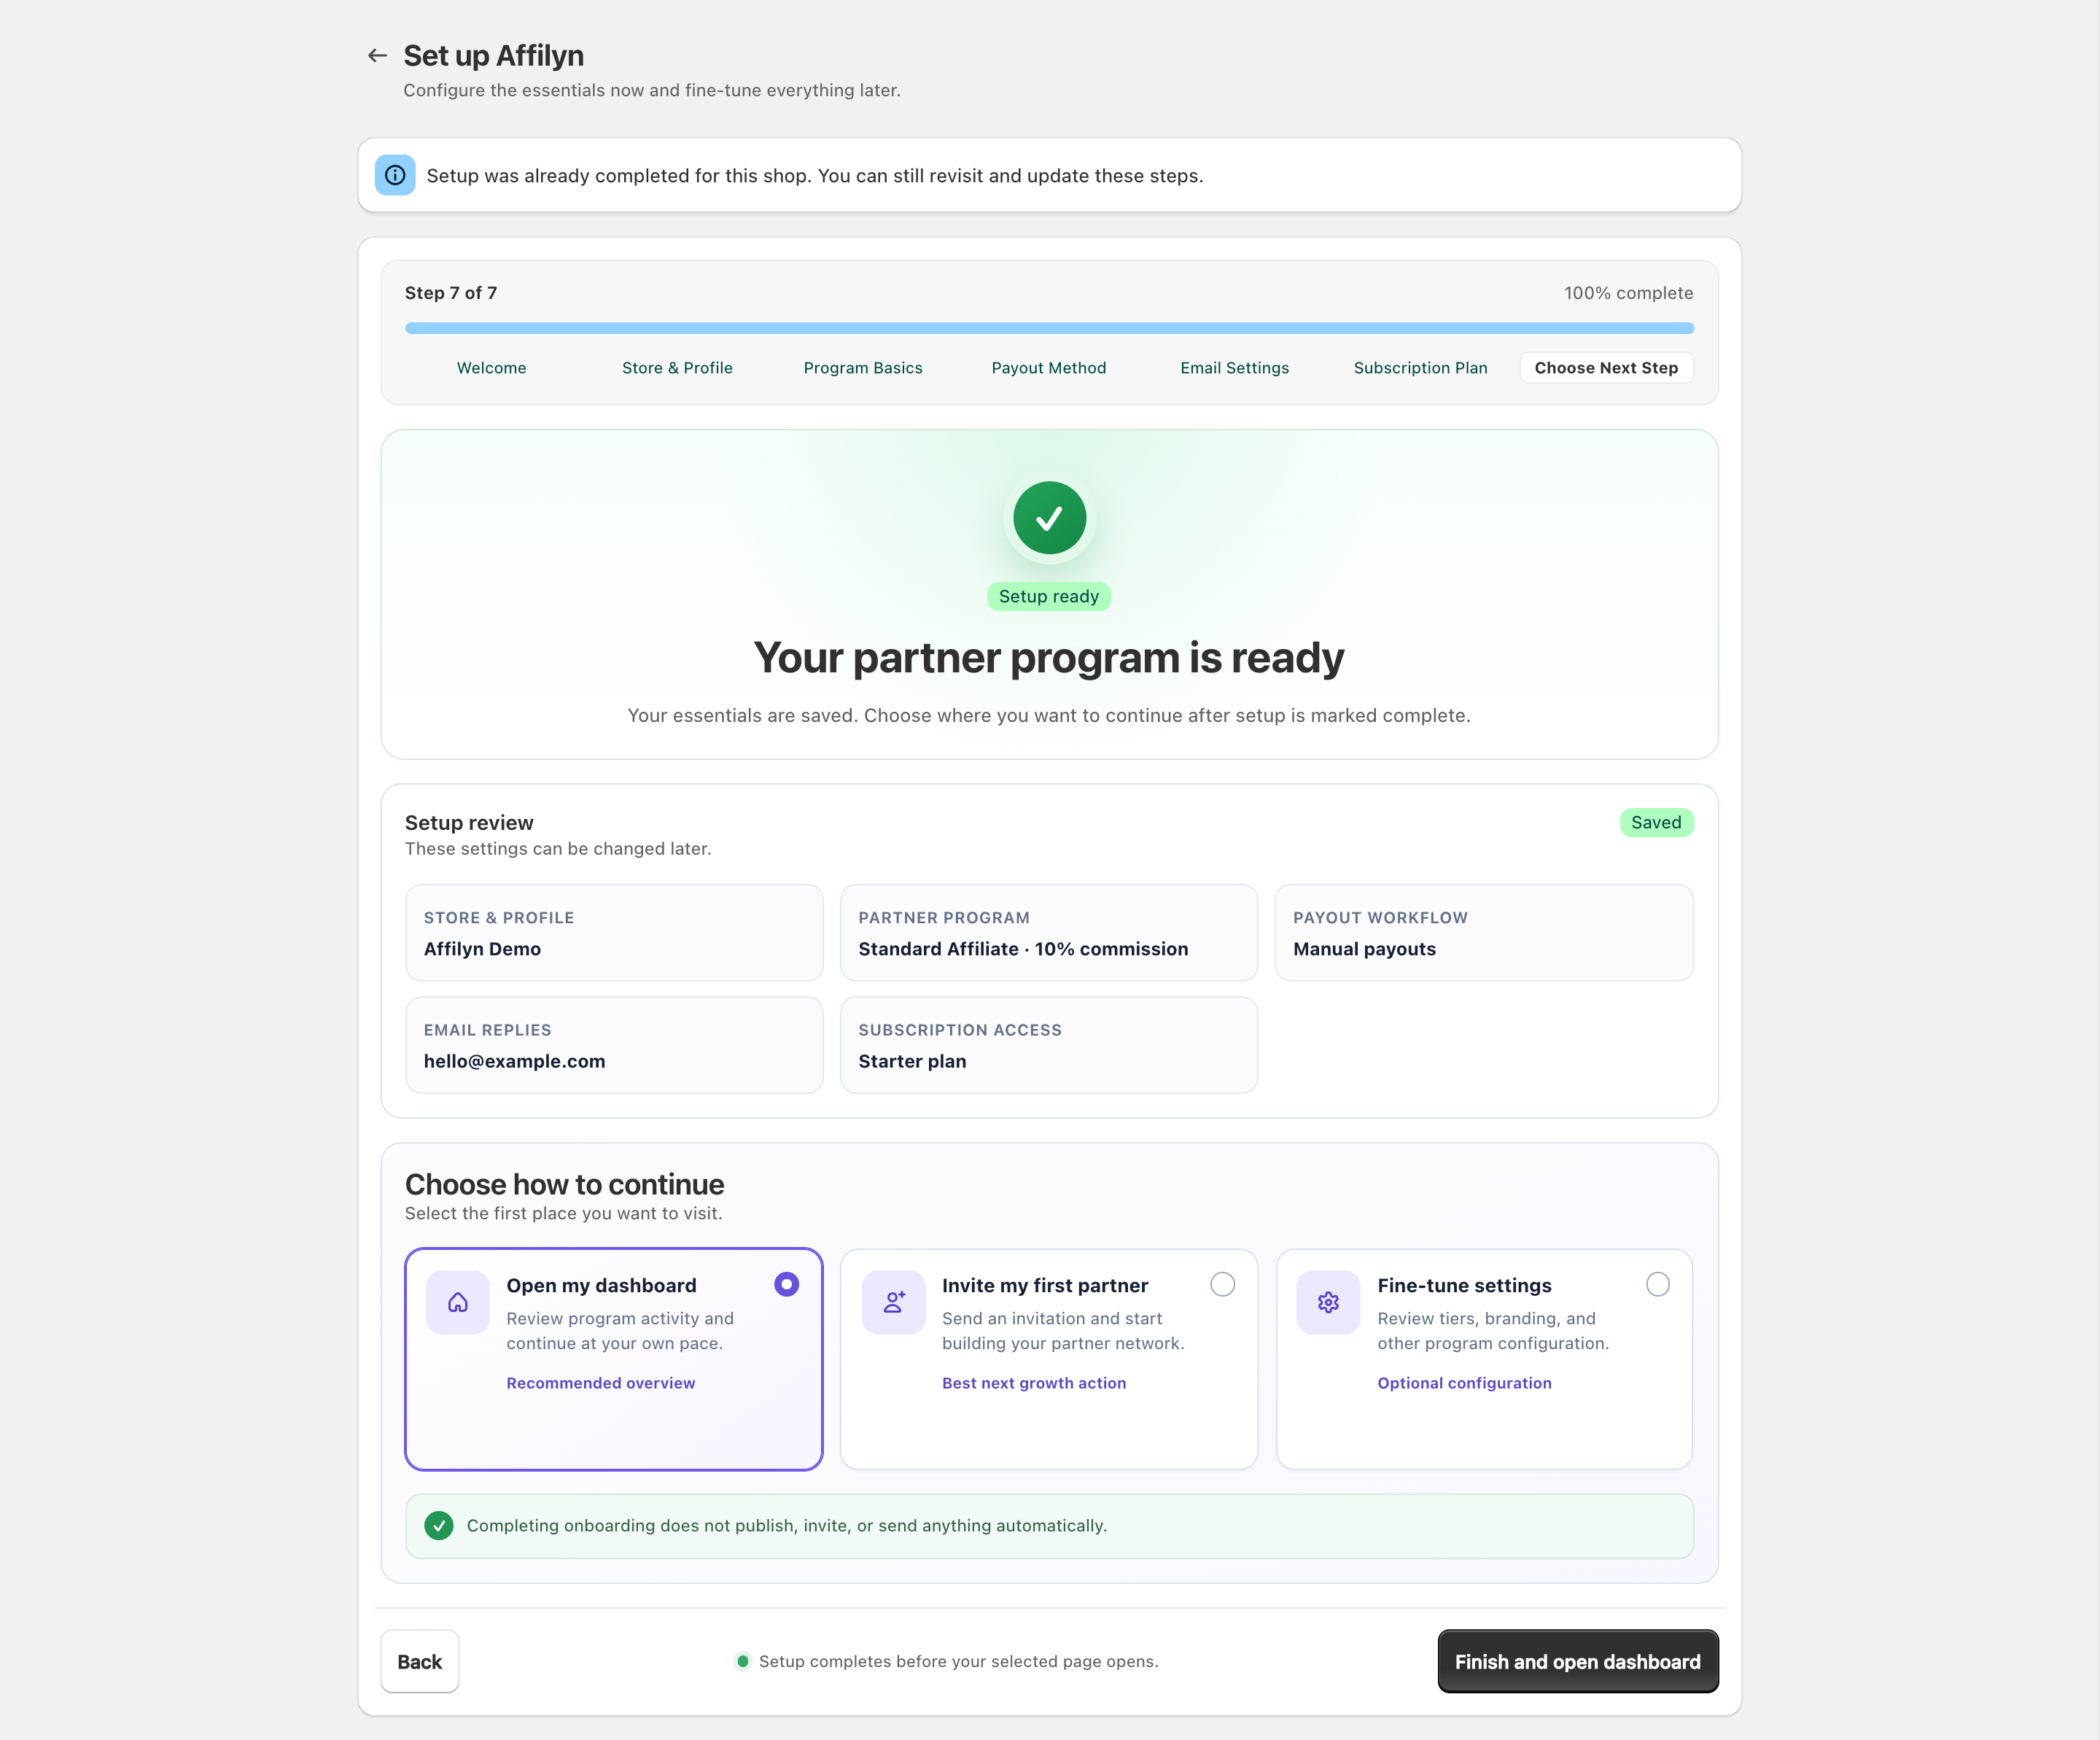
View full-size image: Setup review and next step
Where each final choice takes you
| Choice | Destination | Best use |
|---|---|---|
| Open my dashboard | Merchant dashboard | Review total partners, active storefronts, pending commissions, attributed revenue, recent activity, setup progress, and quick actions. |
| Invite my first partner | Partners → Invite Partner | Search verified external candidates, open a candidate, add an optional personal message, and send an invitation to the current store. |
| Fine-tune settings | Settings → General | Review business identity, website, industry, reply-to email, and email logo before moving into tiers, payouts, applications, and other settings. |
Step 10
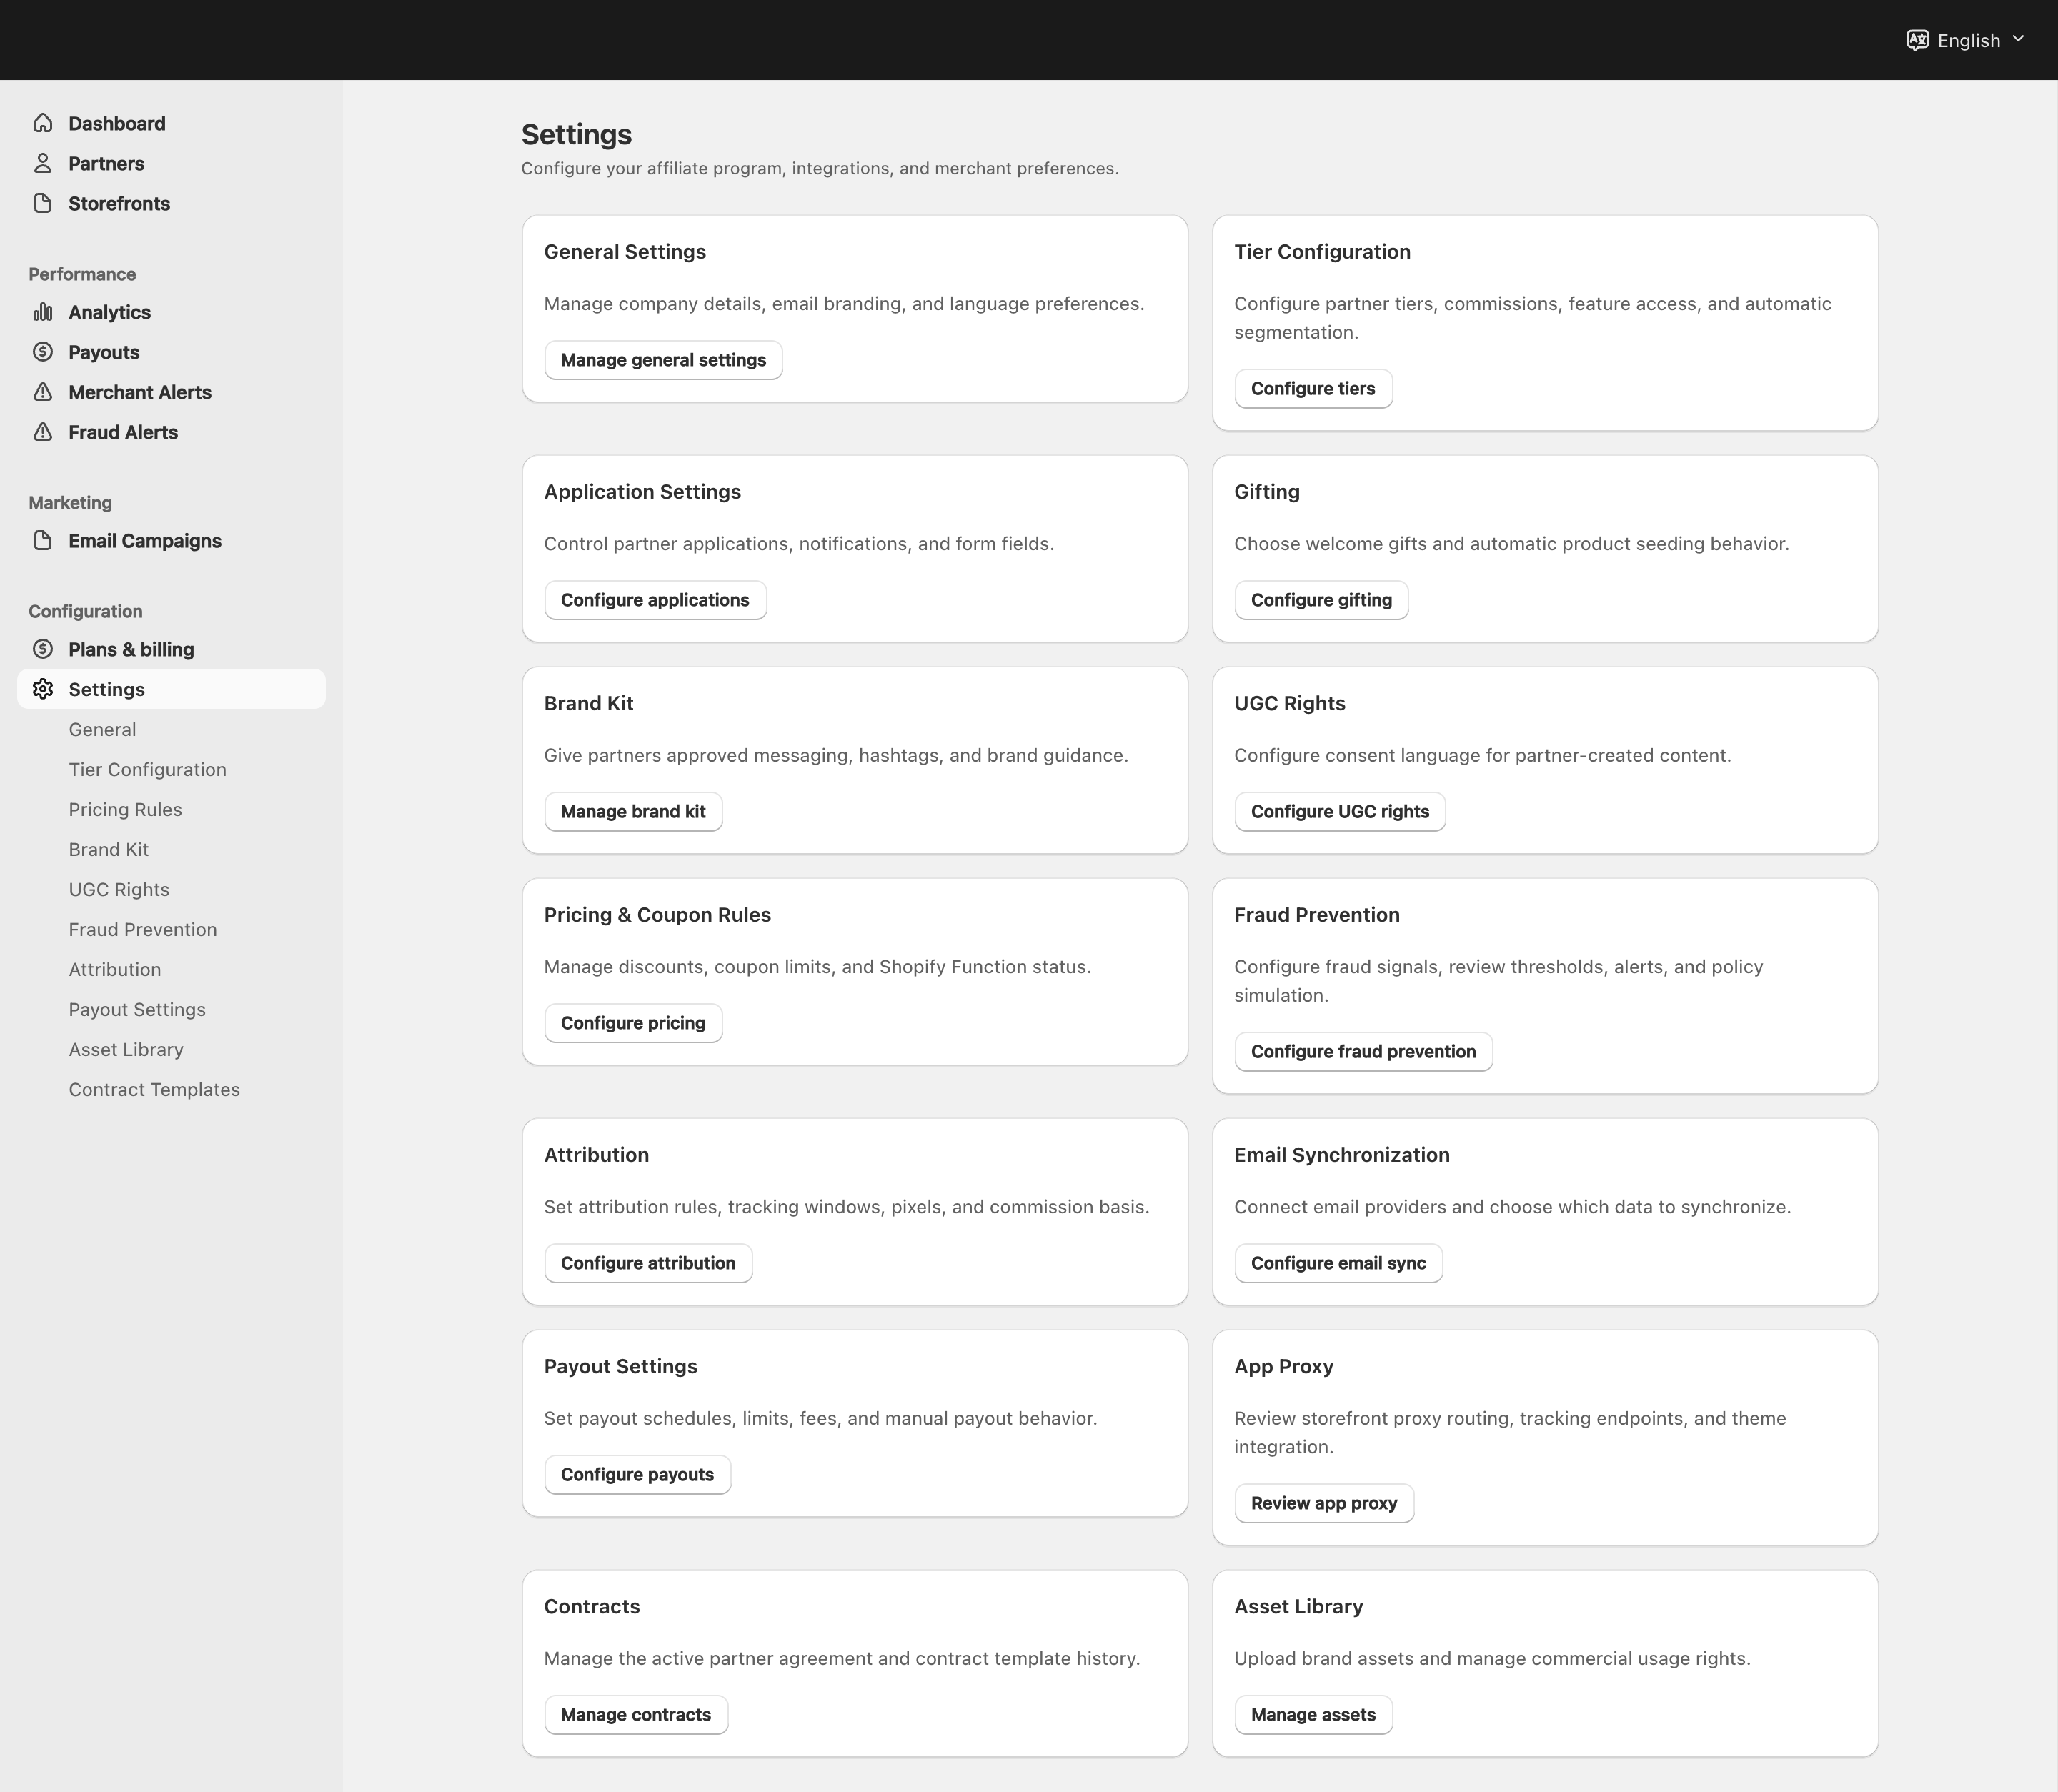
Review the main settings pages before inviting partners.
View full-size image: Merchant Settings overview
Step 11
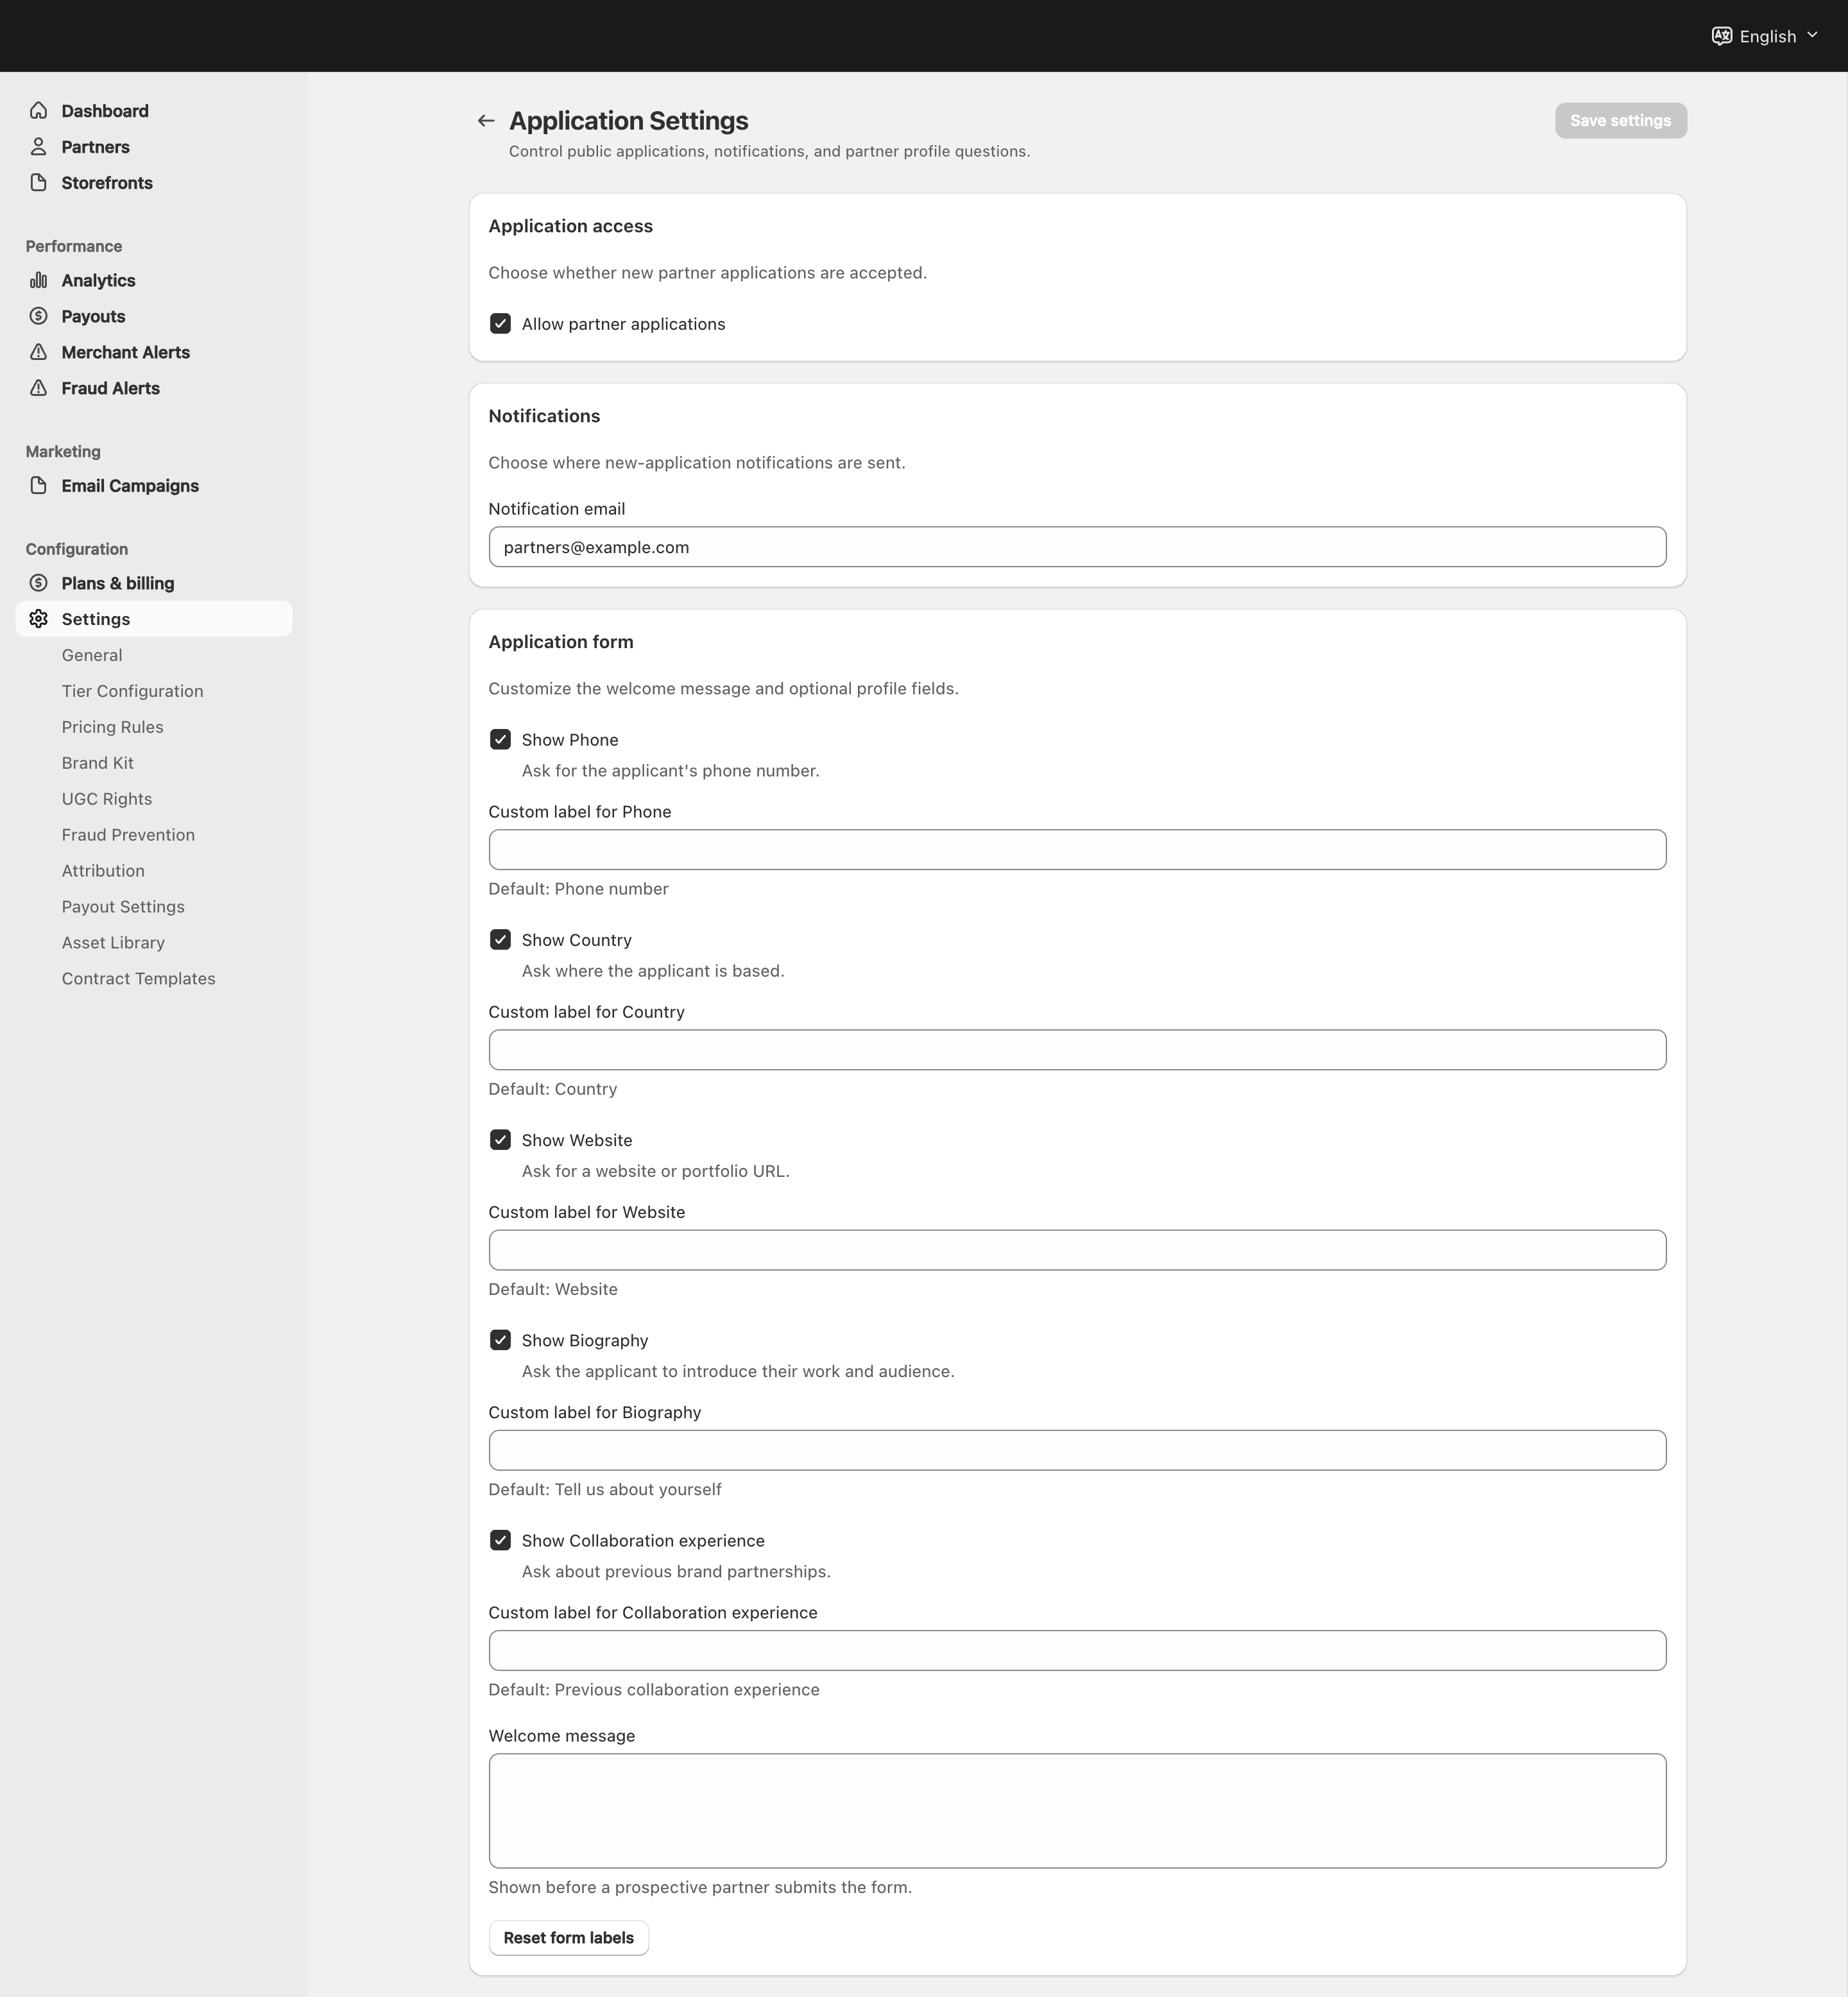
If you want public recruiting, open Settings → Application Settings to enable applications, then publish Partner Apply Button and Partner Application Modal from Shopify Theme Editor.
View full-size image: Partner Program application settings
Settings explained
- Business details store your company name, website, industry, and reply information.
- Default commission sets the base rate used when a partner does not have a custom rate.
- Payout method helps you prepare merchant payout operations before partners request payouts.
- Email settings control reply details and brand presentation for messages sent from the program.
- Plans & billing is the source of truth for live plan prices, feature access, limits, subscription status, and Shopify billing actions.
- Setup review summarizes the values saved by the wizard and lets you choose the first workspace to open after completion.
- Continue setup returns merchants to the unfinished onboarding flow when it was dismissed earlier.
- The final destination only controls which page opens next. Your setup is marked complete regardless of which destination you choose.
Example
A merchant finishes the setup wizard, opens Settings → Application Settings to enable applications, publishes the storefront application button in Theme Editor, and then reviews Pending Requests the next day to confirm public recruiting is live.
Tips and limits
- The setup wizard is the fastest way to get moving, but it does not replace the full settings review.
- You can leave the wizard and return later from the dashboard if setup is not finished in one session.
- Invite my first partner opens the verified-candidate invitation workflow. Use Partners → Add New Partner instead when you already know the person and need to create their profile directly.
- Check Settings → Payout Settings before approving any payout requests later.
- Public applications are a two-step setup: enable them in Application Settings, then place the storefront CTA in Theme Editor.
Current behavior
- Live subscription controls are available from Plans & billing; payout readiness is managed separately from Settings → Payout Settings.
- Merchants can return to unfinished onboarding through Continue setup from the dashboard.
Limitations
- Completing the wizard does not publish the storefront application button for you.
- The wizard does not replace the full settings review for payouts, partner program rules, or long-term configuration.